本博客使用hugo + github + vercel方案部署,记录时间2026/2/25,参考教程来自郝鸿涛博主。
0. 前置知识
Github使用:博客中的所有内容都存储在 GitHub 仓库中,使用 git 进行版本控制和管理。每次修改内容后,提交到 GitHub 仓库。Hugo:是一个基于 Go 语言的静态站点生成器,生成本质是将 Markdown 文件通过模板渲染成静态 HTML 页面。Hugo 会读取 content 目录下的 Markdown 文件,结合 themes 中定义的布局模板,最终输出纯静态的 HTML/CSS/JS 文件到 public 目录。Vercel:是一个云平台,提供静态网站托管和自动部署服务。每次将修改推送到 GitHub 仓库后,Vercel 会自动检测到变化,重新构建 Hugo 站点。
1. Hugo安装
本方案中Hugo可以选择在本地运行构建,也可以选择在vercel上构建。由于调试需求,本方案在本地windows系统中安装Hugo并且调试博客,后续部署到vercel上。
-
第一步,下载。根据系统选择安装方式。根据指引到github的发布界面下载预编译的二进制包,下滑找到对应的系统/架构。
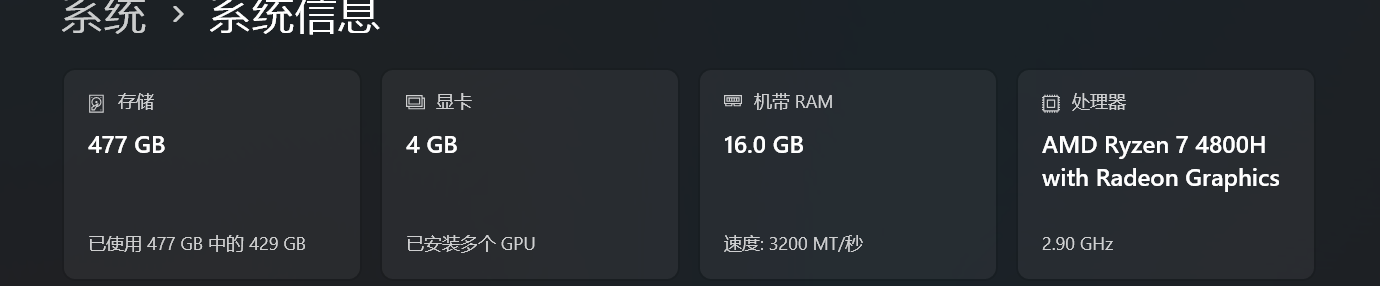
例如我的电脑是amd指令集,并且希望本地构建,所以我下载拓展包hugo_extended_0.155.3_windows-amd64.zip版本。 如果不确定电脑指令集可以在设置->系统->系统信息中查看。
-
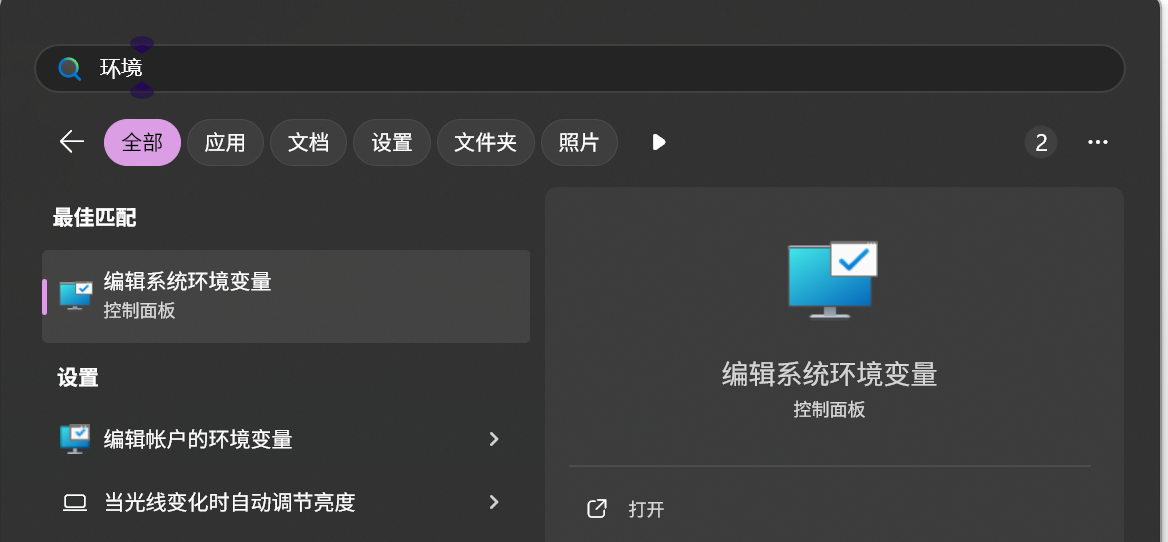
第二步,配置环境变量。下载后保存到指定目录并且解压文件夹,记录解压的路径。继续设置环境变量,可以直接在windows的搜索中搜索关键词打开环境变量编辑。
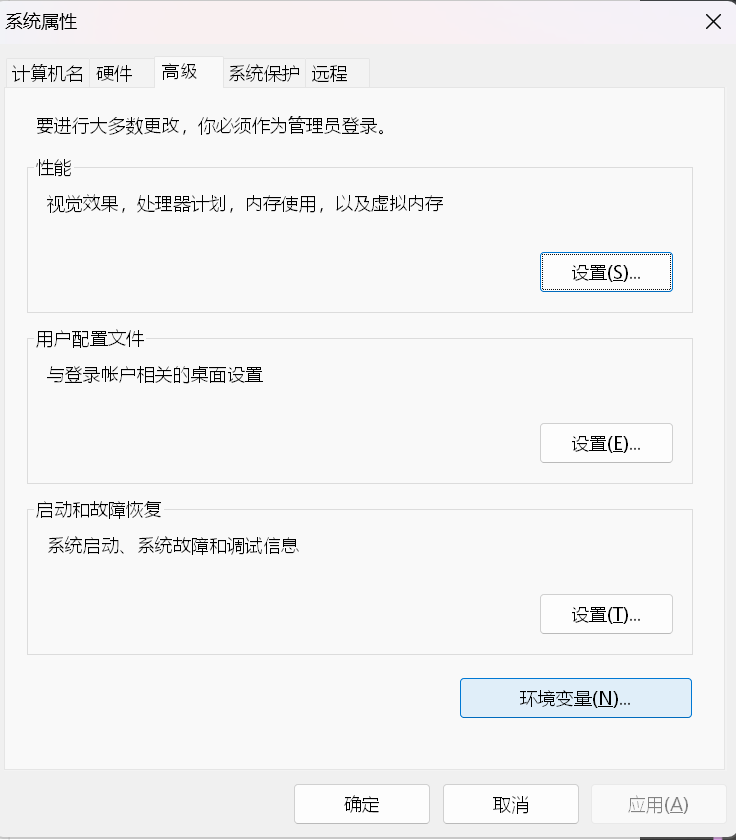
- 点击环境变量
-
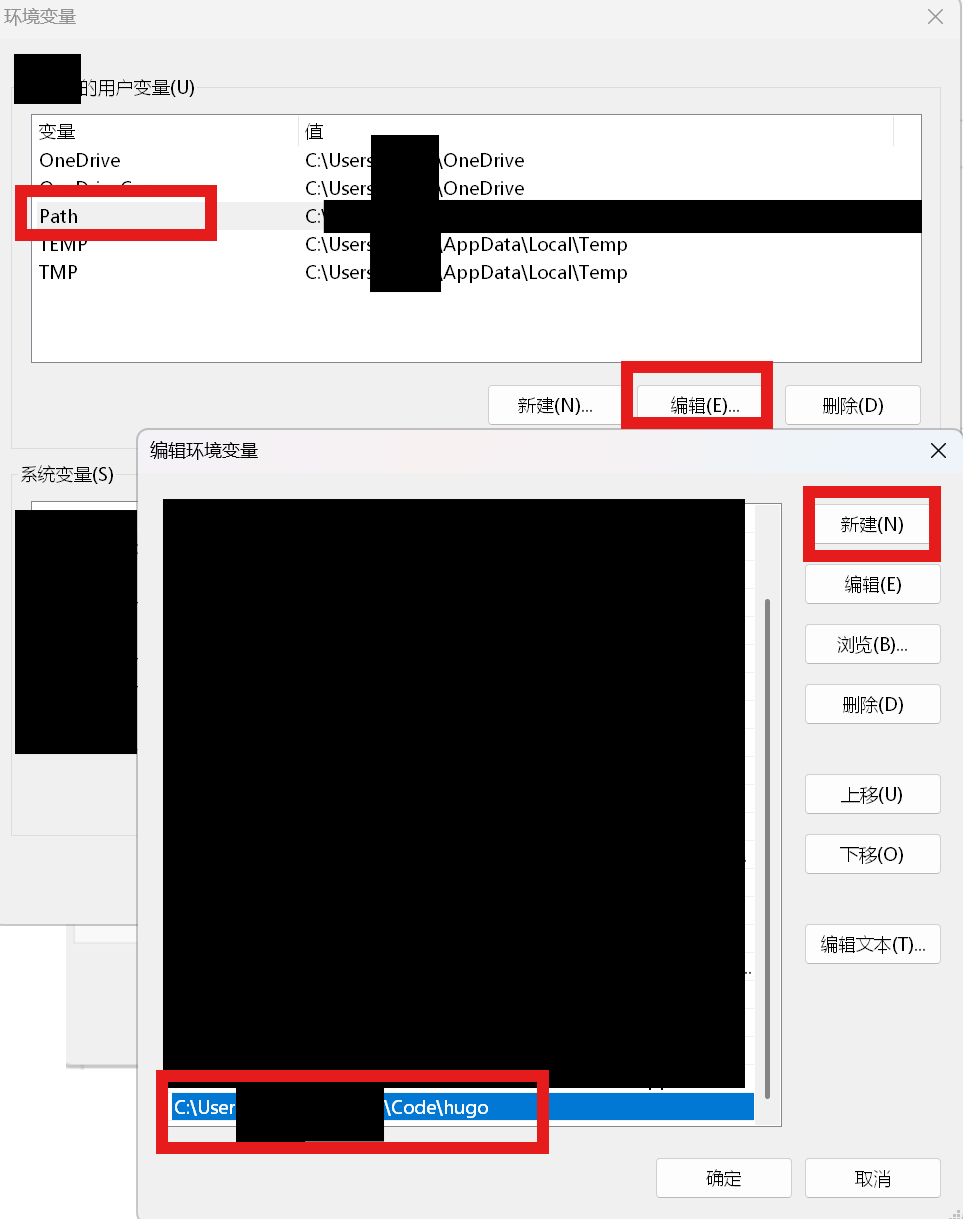
选中并且编辑用户环境变量Path -> 新建一个路径 -> 粘贴刚刚解压的预编译版本的路径,最后一路点击确定,环境变量设置好了。
-
打开一个终端
powershell终端,测试一下
1
2
PS C:\Users> hugo version # 正常输出版本号即配置成功 hugo v0.155.3-8a858213b73907e823e2be2b5640a0ce4c04d295+extended windows/amd64 BuildDate=2026-02-08T16:40:42Z VendorInfo=gohugoio -
第三步,安装编译器Dart Sass。windows下需要使用包管理器Scoop或者Chocolatey,下面以Scoop为例,安装Scoop参考教程
1
2
3
4
5
6
Set-ExecutionPolicy RemoteSigned -Scope CurrentUser -Force # 修改默认策略为同意 iwr -useb scoop.201704.xyz | iex # 安装scoop到用户目录 这里使用的镜像站 scoop help # 有正常输出说明成功安装 scoop install main/sass # 安装sass sass --version # 输出版本号说明成功安装 1.83.4
2. 搭建站点
-
第一步, 本地继续使用
powershell用Hugo初始化一个目录用来存放所有文件,并且移动到改目录下1 2 3 4 5 6 7 8 9 10 11 12 13 14 15 16 17blog> hugo new site MyBlog # 在当前目录下创建一个新的 Hugo 站点,目录名为 MyBlog Congratulations! Your new Hugo project was created in blog\MyBlog. Just a few more steps... 1. Change the current directory to blog\MyBlog. 2. Create or install a theme: - Create a new theme with the command "hugo new theme <THEMENAME>" - Or, install a theme from https://themes.gohugo.io/ 3. Edit hugo.toml, setting the "theme" property to the theme name. 4. Create new content with the command "hugo new content <SECTIONNAME>\<FILENAME>.<FORMAT>". 5. Start the embedded web server with the command "hugo server --buildDrafts". See documentation at https://gohugo.io/. blog> cd MyBlog # 移动到MyBlog目录 blog\MyBlog> -
第二步,在github中新建一个仓库,并且把本地MyBlog目录链接到远程仓库
1 2 3blog\MyBlog> git init # 初始化仓库 Initialized empty Git repository in /blog/MyBlog/.git/ blog\MyBlog> git remote add origin https://github.com/huluhuluu/MyBlog.git # 链接远程仓库 -
第三步, 查找并且下载想要的站点主题,点击Download会跳转到github仓库链接,例如Anatole。把主题作为submodule拉取下来
1 2 3 4 5 6 7blog\MyBlog> git submodule add https://github.com/lxndrblz/anatole.git themes/anatole Cloning into '/blog/MyBlog/themes/anatole'... remote: Enumerating objects: 5345, done. Receiving objects: 100% (5345/5345), 7.96 MiB | 4.72 MiB/s, done.5 (from 1)Receiving objects: 100% (5345/5345), 1.49 MiB | 1.21 MiB/s Resolving deltas: 100% (3145/3145), done. blog\MyBlog> Add-Content -Path "hugo.toml" -Value "`ntheme = `"anatole`"" -
第四步,测试一下主题
1 2 3 4 5 6 7 8 9 10 11 12 13 14 15 16 17 18 19 20 21 22 23 24 25 26 27 28 29 30 31 32cd themes/anatole/exampleSite # 移动到示例目录 hugo server --themesDir ../.. # 启动hugo # 出现下面输出 blog\MyBlog\themes\anatole\exampleSite> hugo server --themesDir ../.. Watching for changes in ... Start building sites … hugo v0.155.3-8a858213b73907e823e2be2b5640a0ce4c04d295+extended windows/amd64 BuildDate=2026-02-08T16:40:42Z VendorInfo=gohugoio WARN The "x" shortcode was unable to retrieve the remote data: template: _shortcodes/x.html:20:25: executing "render-x" at <resources.GetRemote>: error calling GetRemote: Get "https://publish.x.com/oembed?dnt=false&url=https%3A%2F%2Fx.com%2FSanDiegoZoo%2Fstatus%2F1453110110599868418": net/http: TLS handshake timeout. See "blog\MyBlog\themes\anatole\exampleSite\content\english\post\rich-content.md:26:1" You can suppress this warning by adding the following to your site configuration: ignoreLogs = ['shortcode-x-getremote'] WARN The "vimeo_simple" shortcode was unable to retrieve the remote data: template: _shortcodes/vimeo_simple.html:26:25: executing "render-vimeo" at <resources.GetRemote>: error calling GetRemote: Get "https://vimeo.com/api/oembed.json?dnt=0&url=https%3A%2F%2Fvimeo.com%2F48912912": dial tcp 31.13.94.41:443: connectex: A connection attempt failed because the connected party did not properly respond after a period of time, or established connection failed because connected host did not properly respond.. See "blog\MyBlog\themes\anatole\exampleSite\content\english\post\rich-content.md:34:1" You can suppress this warning by adding the following to your site configuration: ignoreLogs = ['shortcode-vimeo-simple'] │ EN │ AR ──────────────────┼────┼──── Pages │ 68 │ 20 Paginator pages │ 1 │ 0 Non-page files │ 0 │ 0 Static files │ 13 │ 13 Processed images │ 0 │ 0 Aliases │ 13 │ 9 Cleaned │ 0 │ 0 Built in 31850 ms Environment: "development" Serving pages from disk Running in Fast Render Mode. For full rebuilds on change: hugo server --disableFastRender Web Server is available at http://localhost:1313/ (bind address 127.0.0.1) Press Ctrl+C to stop在浏览器打开网页部署的地址http://localhost:1313/如下,说明能够正常使用
2.1 目录结构说明
Hugo 的目录结构如下:
|
|
关键目录说明:
- config/: Hugo 支持将配置拆分成多个文件,便于管理
- content/: 存放所有 Markdown 文章,每个文章可以是一个单独的文件夹,方便管理图片
- static/: 存放图片、favicon 等静态资源,构建时会直接复制到 public 目录
- themes/: 主题文件,建议用 git submodule 管理
2.2 修改并且推送到远程仓库
- 修改博客内容,例如在
content/post/目录下新建一个markdown文件hello-world.md,并且添加一些内容,这里我使用iflow agent帮我配置主题以及个人信息和博客; - 把本地内容推送到远程仓库:
注意:需要把构建的中间产物 public/ 和 resources/ 目录加入 .gitignore 文件中,避免推送到远程仓库
1 2 3 4 5 6 7 8 9 10 11 12 13 14 15 16blog\MyBlog> git add . # 添加修改到暂存区 blog\MyBlog> git commit -m "init repo" # 保存暂存区修改 [master (root-commit) 94d3942] init repo 46 files changed, 1088 insertions(+) blog\MyBlog> git push -u origin master # 推送至远程仓库 Enumerating objects: 62, done. Counting objects: 100% (62/62), done. Delta compression using up to 16 threads Compressing objects: 100% (53/53), done. Writing objects: 100% (62/62), 735.91 KiB | 21.64 MiB/s, done. Total 62 (delta 1), reused 0 (delta 1), pack-reused 0 remote: Resolving deltas: 100% (1/1), done. To https://github.com/huluhuluu/MyBlog.git * [new branch] master -> master branch 'master' set up to track 'origin/master'.1 2 3 4 5 6# .gitignore 文件 public/ resources/ # agents 相关文件 AGENTS.md
2.3 Front Matter说明
Front Matter 是 Hugo 文章头部的元数据部分,使用 YAML、TOML 或 JSON 格式编写。以下是一些常用的特殊标记:
draft: true:如果在文章的 Front Matter 中添加了draft: true,Hugo 在构建时会忽略这篇文章,不会生成对应的 HTML 页面。这对于正在撰写或不想公开的文章非常有用。math: true:如果在文章的 Front Matter 中添加了math: true,Hugo 会启用数学公式的渲染支持,允许在文章中使用 LaTeX 语法编写数学公式,并且在构建时正确渲染成 HTML 格式。这对于需要展示数学内容的博客文章非常有用。comments: true:如果在文章的 Front Matter 中添加了comments: true,Hugo 会启用评论功能,允许读者在文章页面下方发表评论。这通常需要配合第三方评论系统(如 Disqus、Giscus 等)使用,以便读者能够留下反馈和讨论。categories和tags:这两个字段用于对文章进行分类和标签化,方便读者通过分类和标签浏览相关内容。categories通常用于较大的主题分类,而tags则用于更具体的关键词标记。slug:这个字段用于指定文章的 URL 路径,如果不设置,Hugo 会根据文章标题自动生成一个 slug。通过设置slug,你可以自定义文章的 URL,使其更简洁。
2.4 hugo.toml 说明
hugo.toml 是 Hugo 站点的主配置文件,使用 TOML 格式编写。以下是一些常用的配置项:
baseURL:指定站点的基础 URL,通常是你博客的域名,例如https://www.example.com/。这个配置对于生成正确的链接和资源路径非常重要。theme:指定站点使用的主题名称,与themes/目录下的主题文件夹名称一致.paginate:指定每页显示的文章数量,例如paginate = 10表示每页显示 10 篇文章。permalinks:配置文章的 URL 结构,例如:这表示文章的 URL 将包含年份、月份、日期和 slug,例如1 2[permalinks] post = "/:year/:month/:day/:slug/"https://www.example.com/post/2026/02/25/my-article/。module: 模块挂载系统:使用多个子模块管理内容,并且通过模块挂载系统把子模块中的内容挂载到主仓库的content目录下,方便管理和部署。 这里把1 2 3 4 5 6 7 8 9[module] [[module.mounts]] source = "content" target = "content" excludeFiles = ["post/b1/blog/**"] [[module.mounts]] source = "content/post/b1/blog" target = "content/post"content/post/b1/blog目录下的内容挂载到content/post目录下,部署时会把content/post/b1/blog目录下的内容部署到content/post目录下。
3. vercel部署
这里分静态部署和动态部署两种方式,静态部署是指在本地构建好的静态文件,动态部署是指每次修改内容后直接推送到github,vercel会自动检测到变化并且重新构建和部署。这里选择动态部署的方式:
-
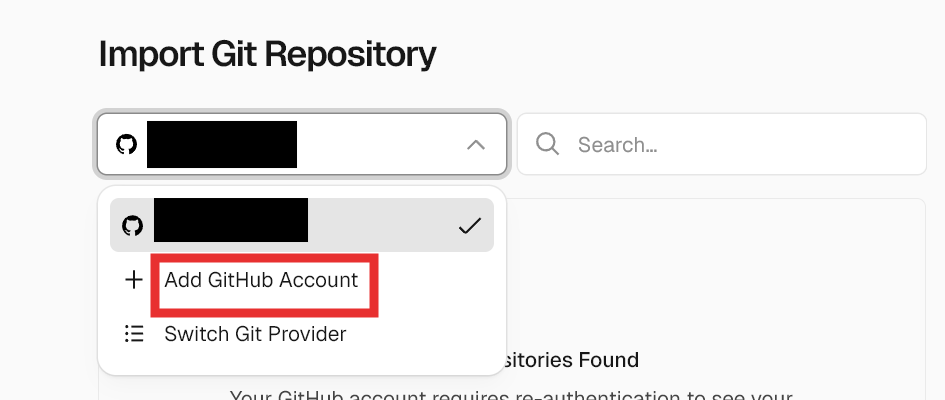
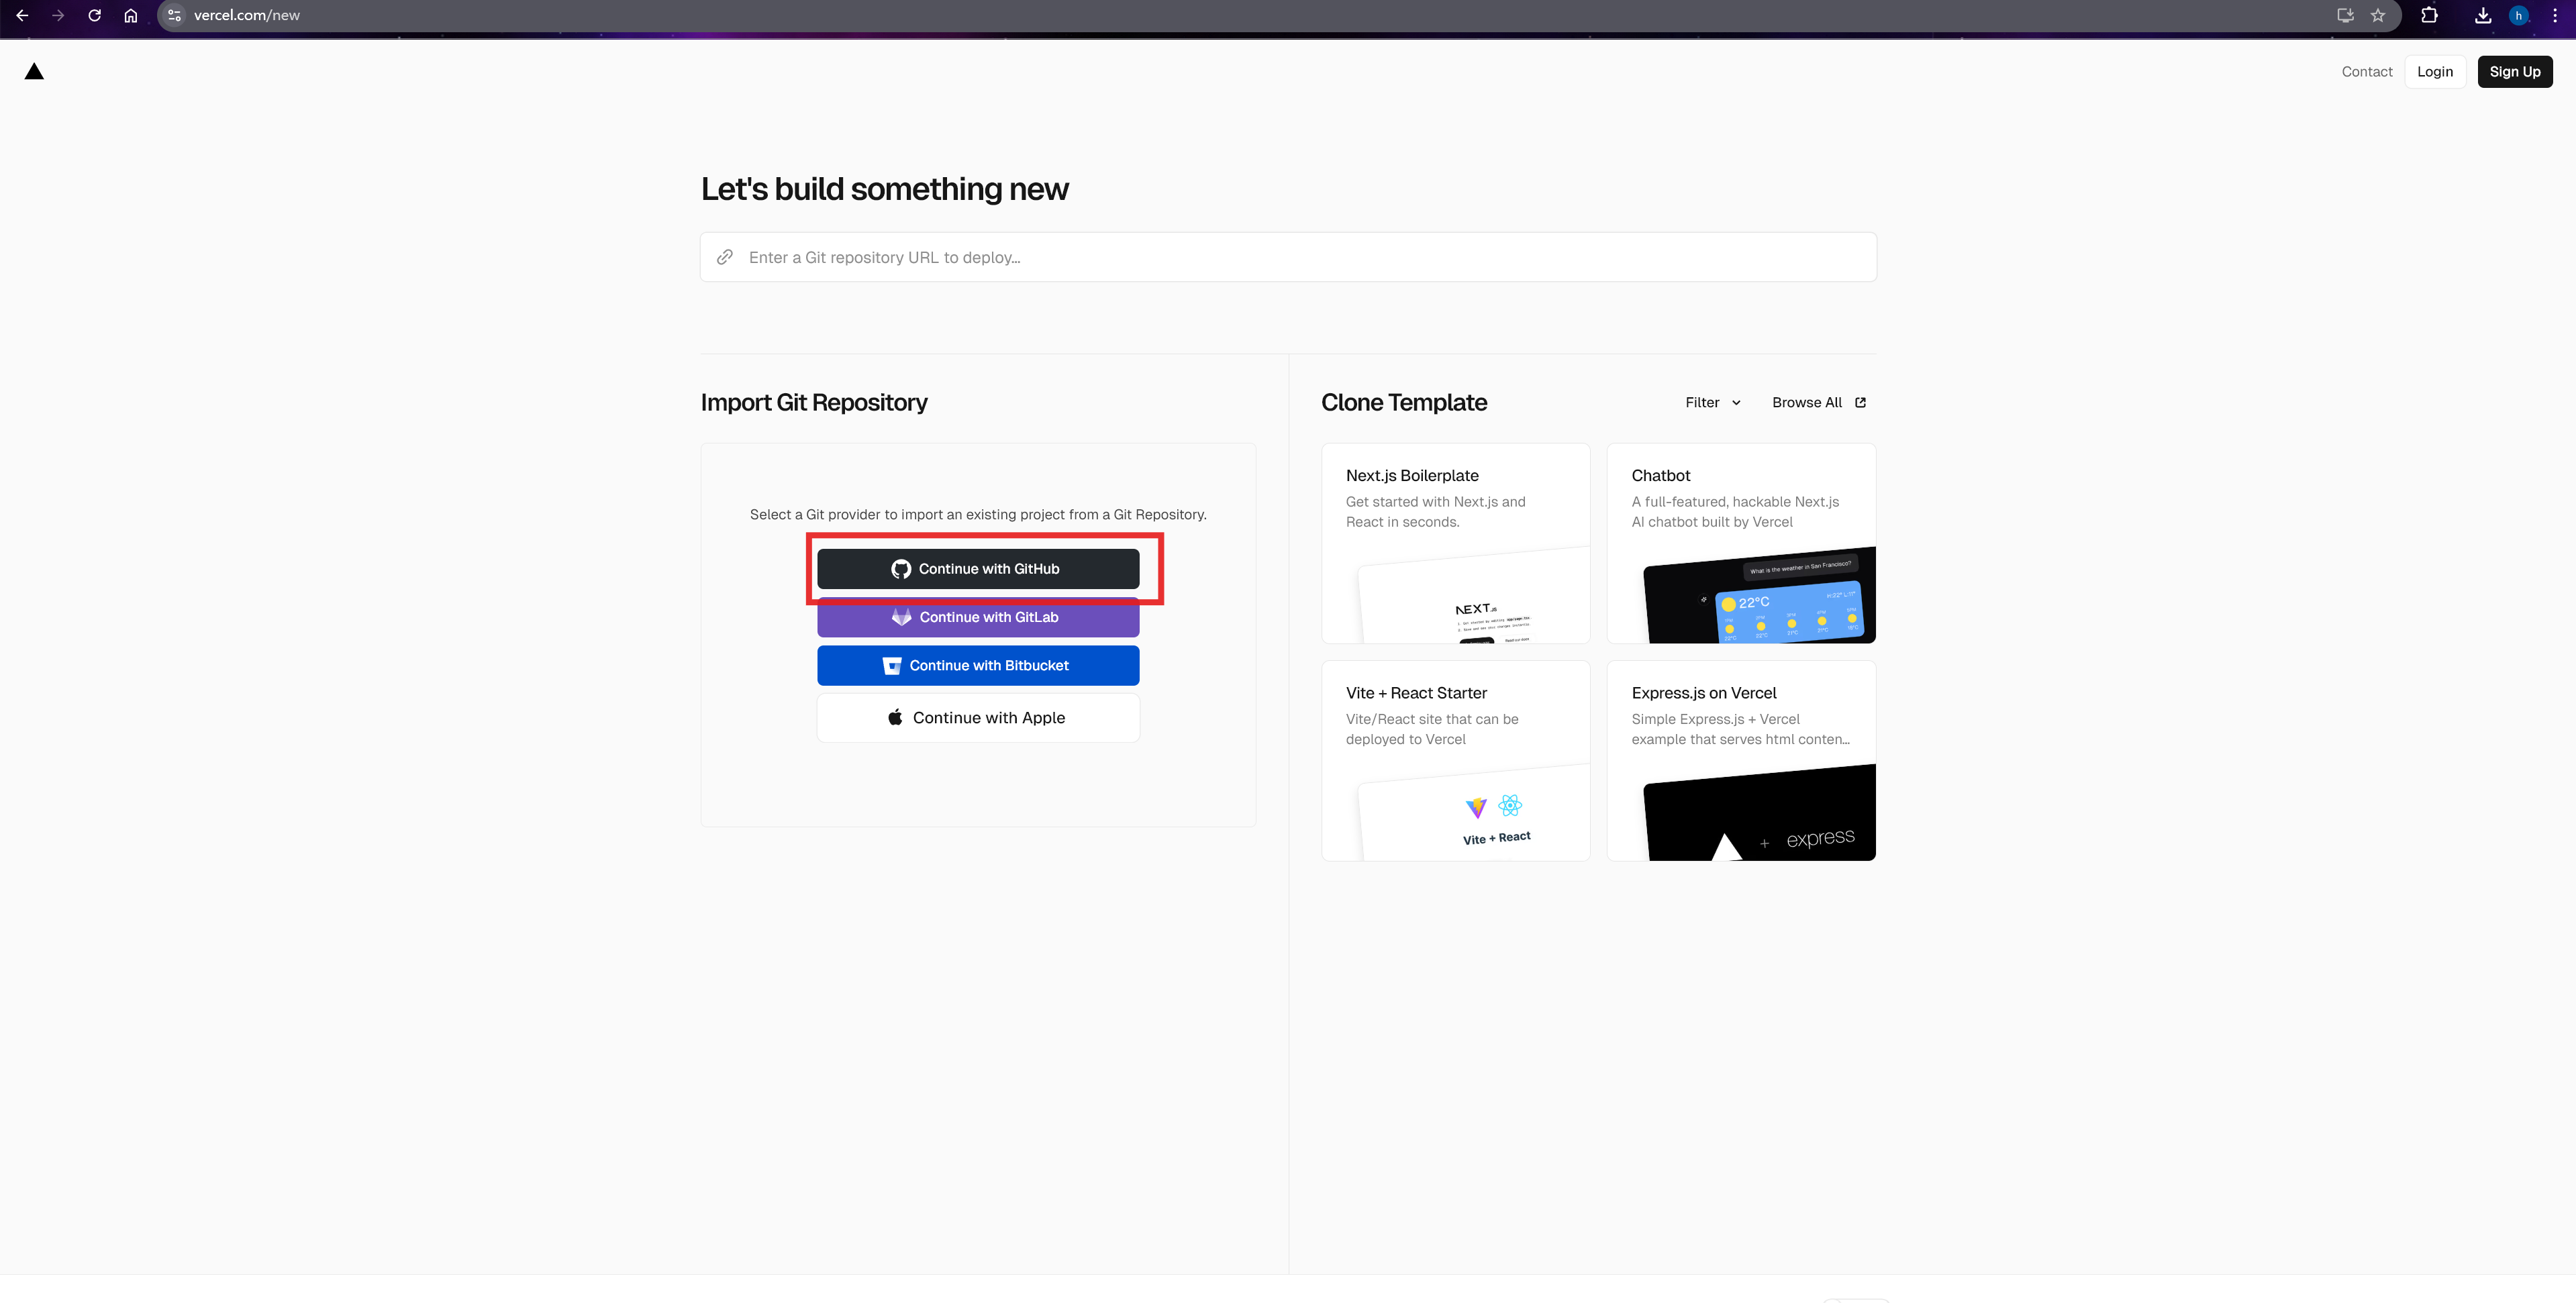
打开Vercel,点击
Add New -> Project新建项目,使用github快速登录
-
选择个人账号里需要部署的仓库, 点击Install继续:
-
选好后如下图,点击
Import继续导入: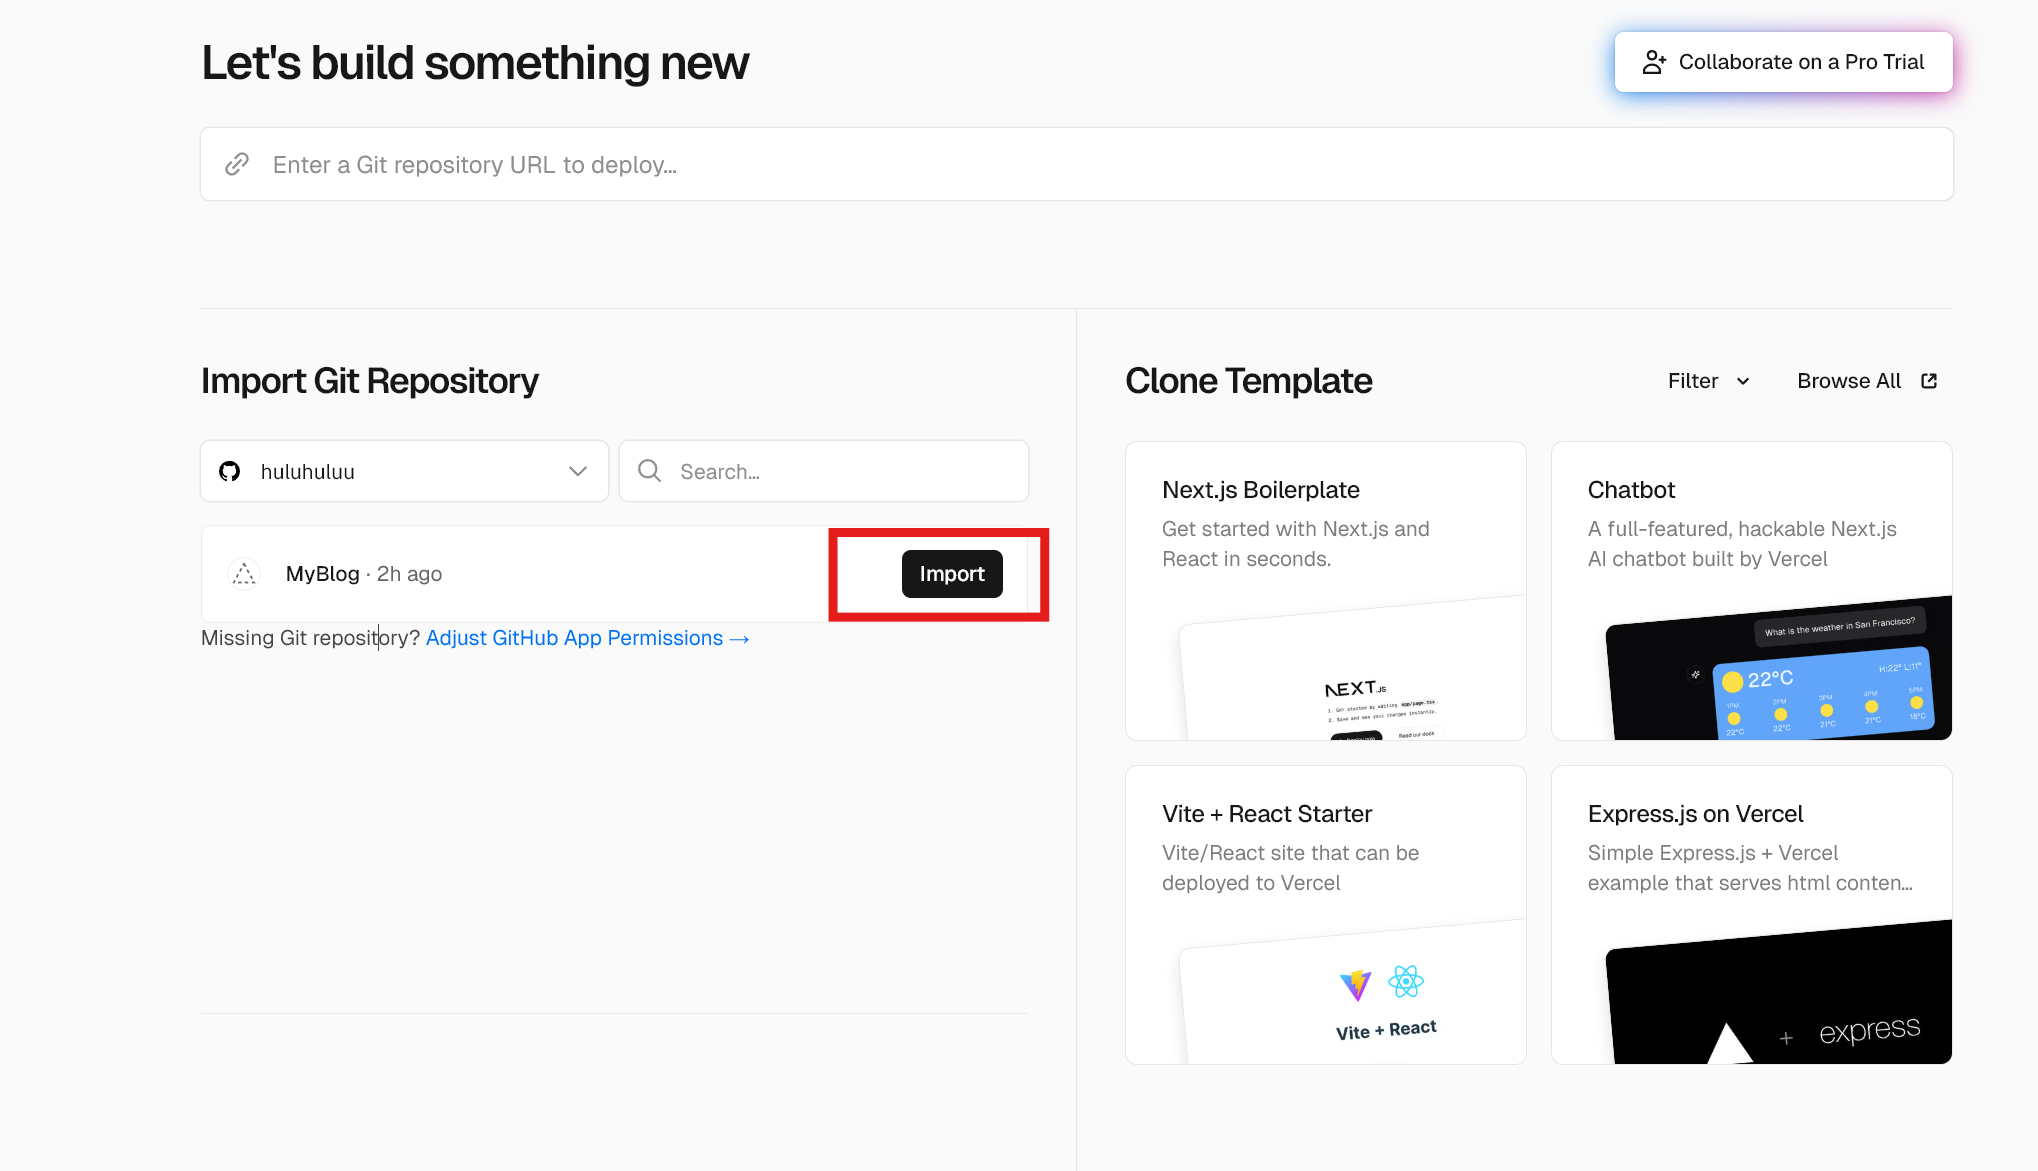
-
进入项目设置界面,选择
Application Preset为Hugo,并且配置环境变量HUGO_VERSION为自己使用的版本号,点击Deploy继续: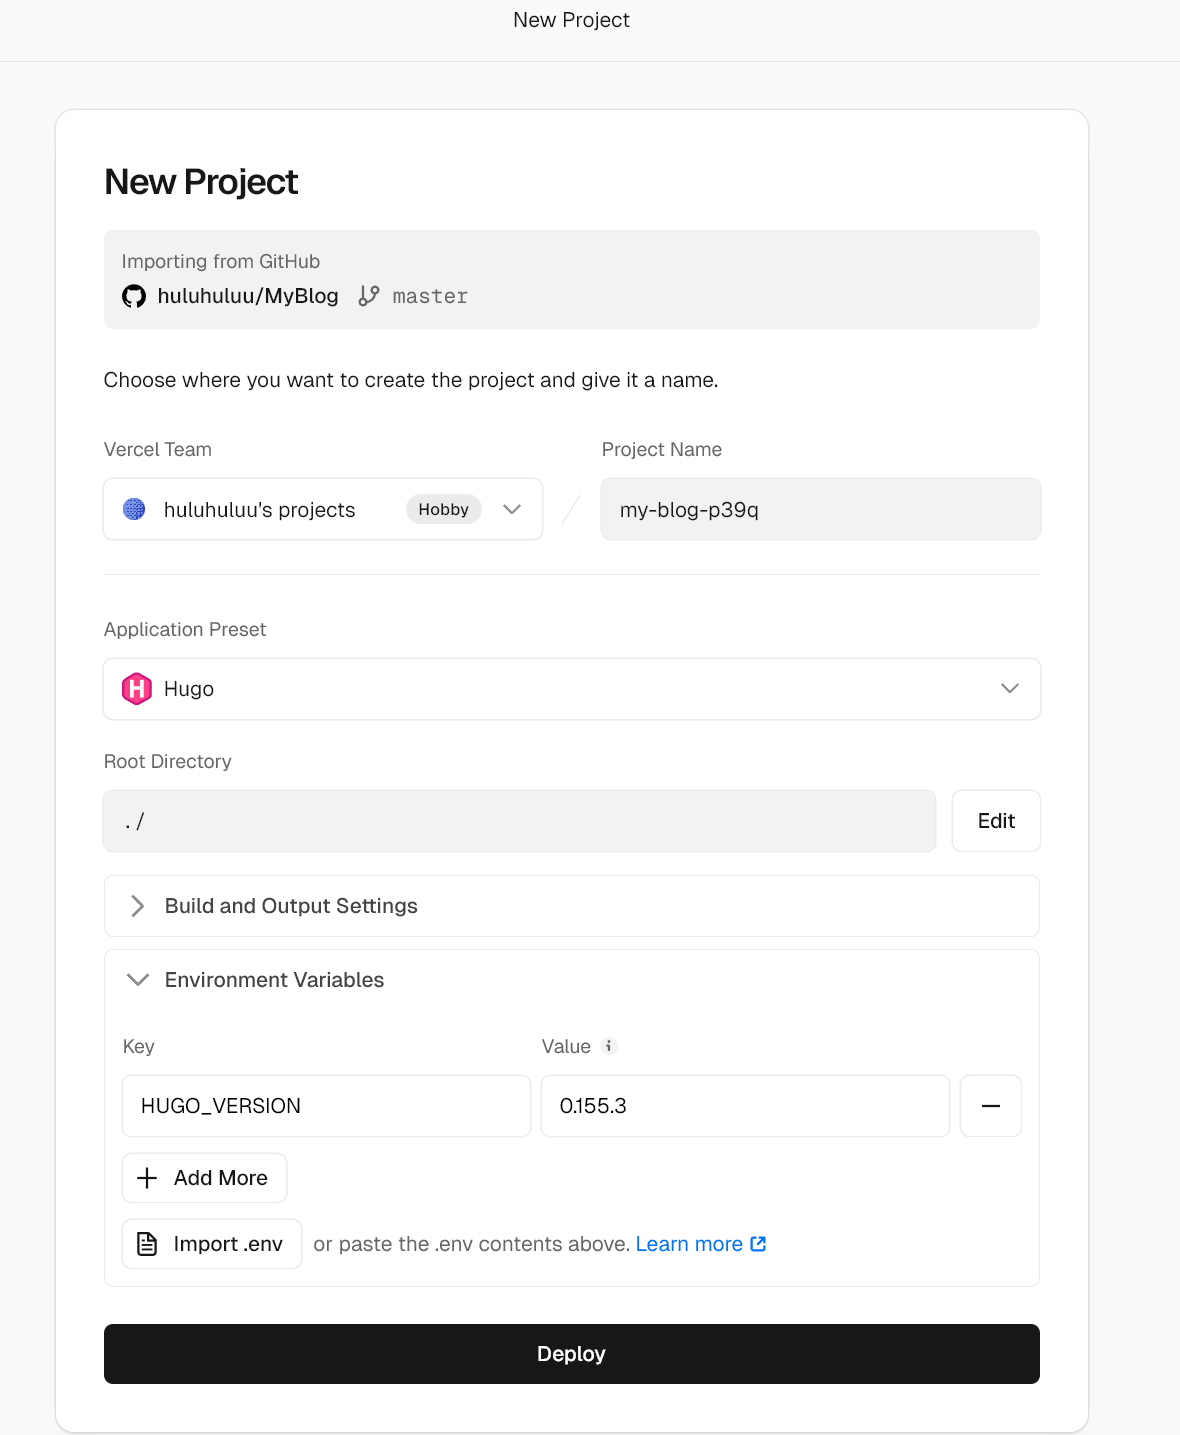
HUGO_VERSION是安装时下载文件上的版本号,可以通过powershell命令查看:1 2PS C:\Users> hugo version hugo v0.155.3-8a858213b73907e823e2be2b5640a0ce4c04d295+extended windows/amd64 BuildDate=2026-02-08T16:40:42Z VendorInfo=gohugoio -
部署完成后进入仪表盘
Continue to Dashboard: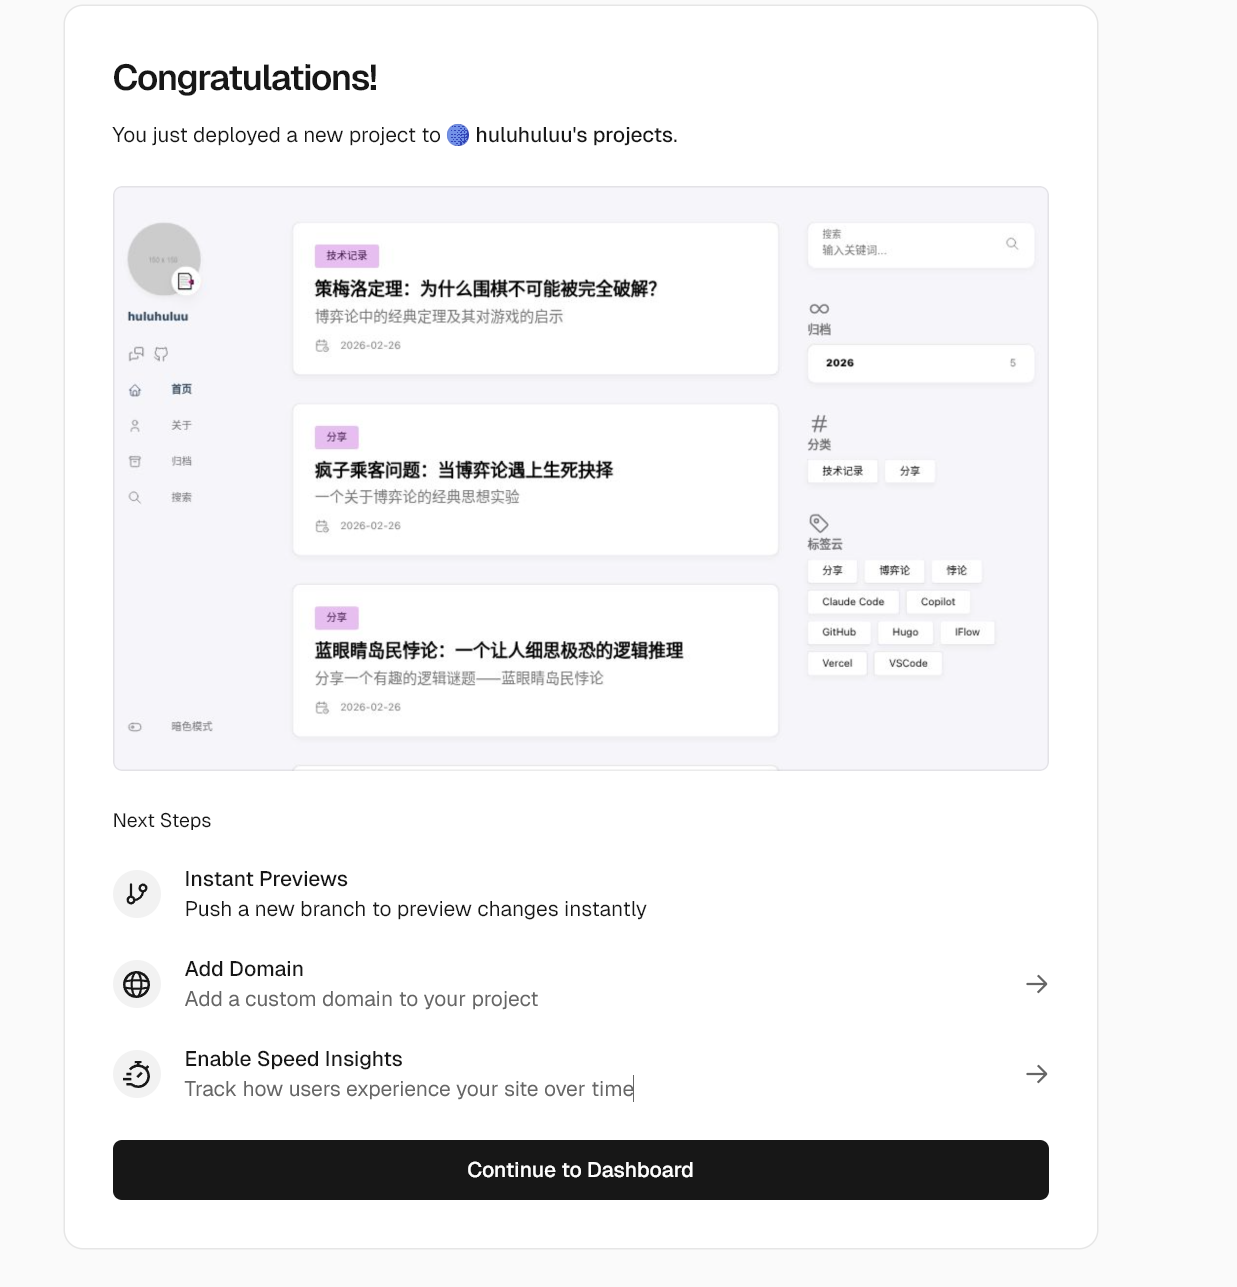
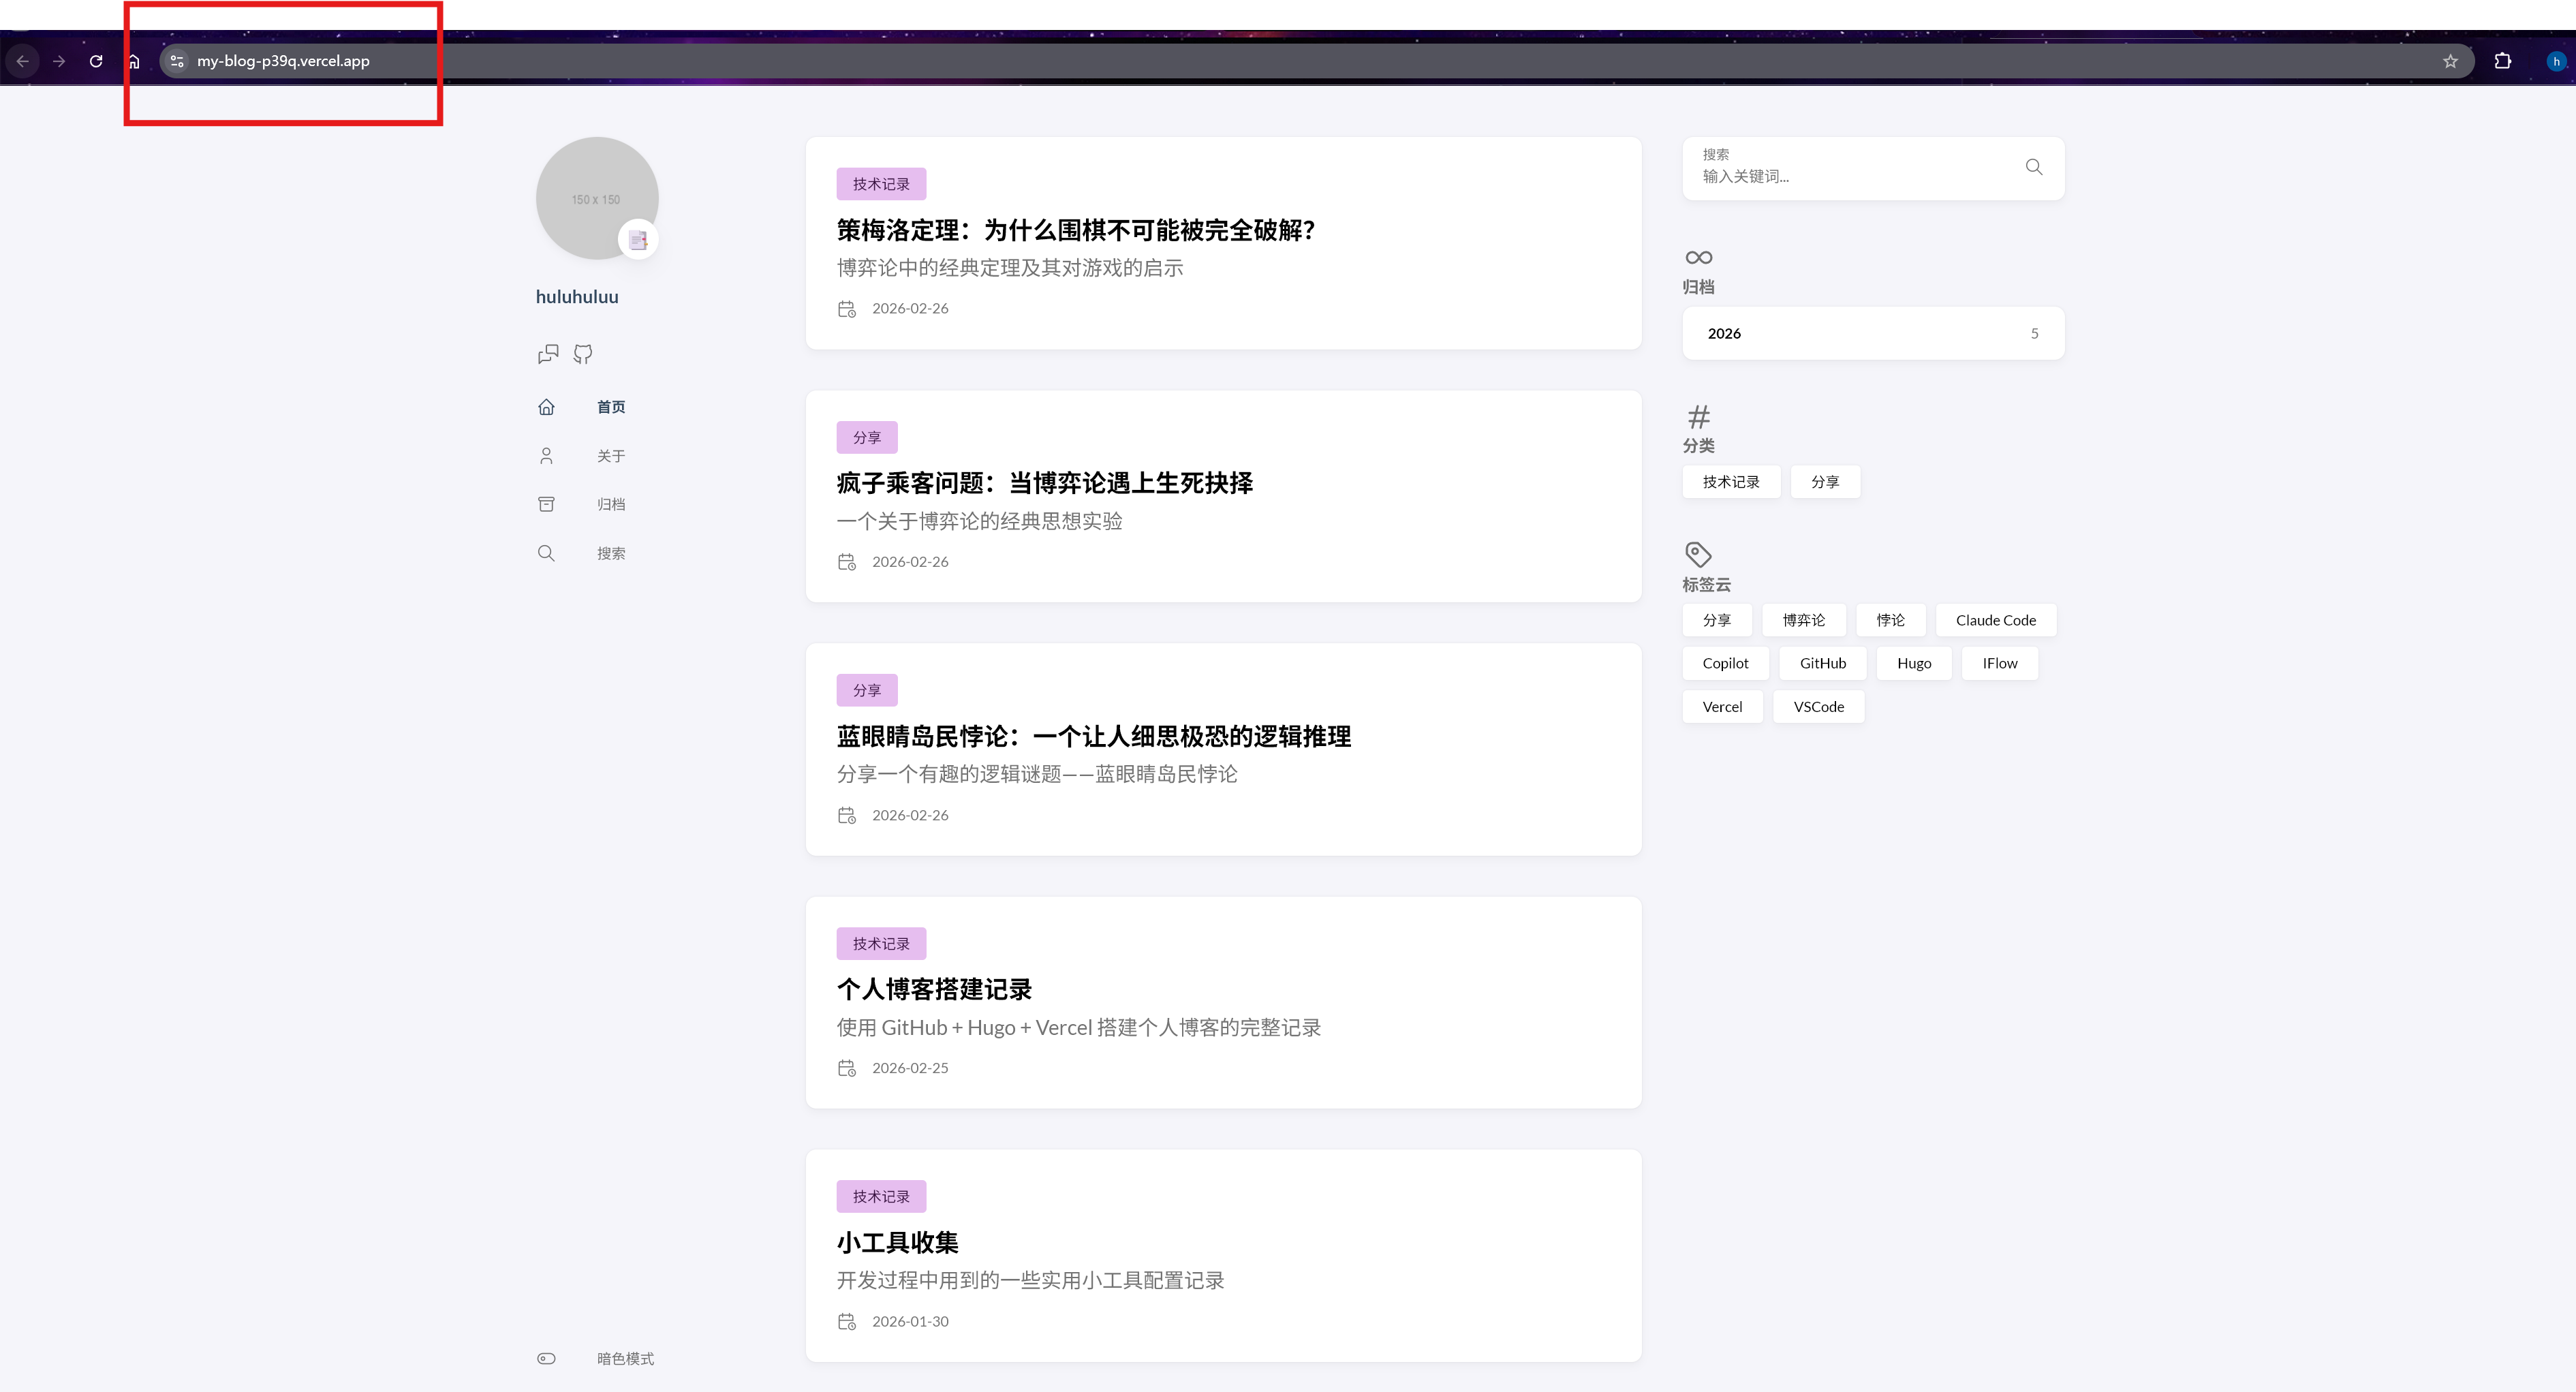
可以看到vercel分配的域名,
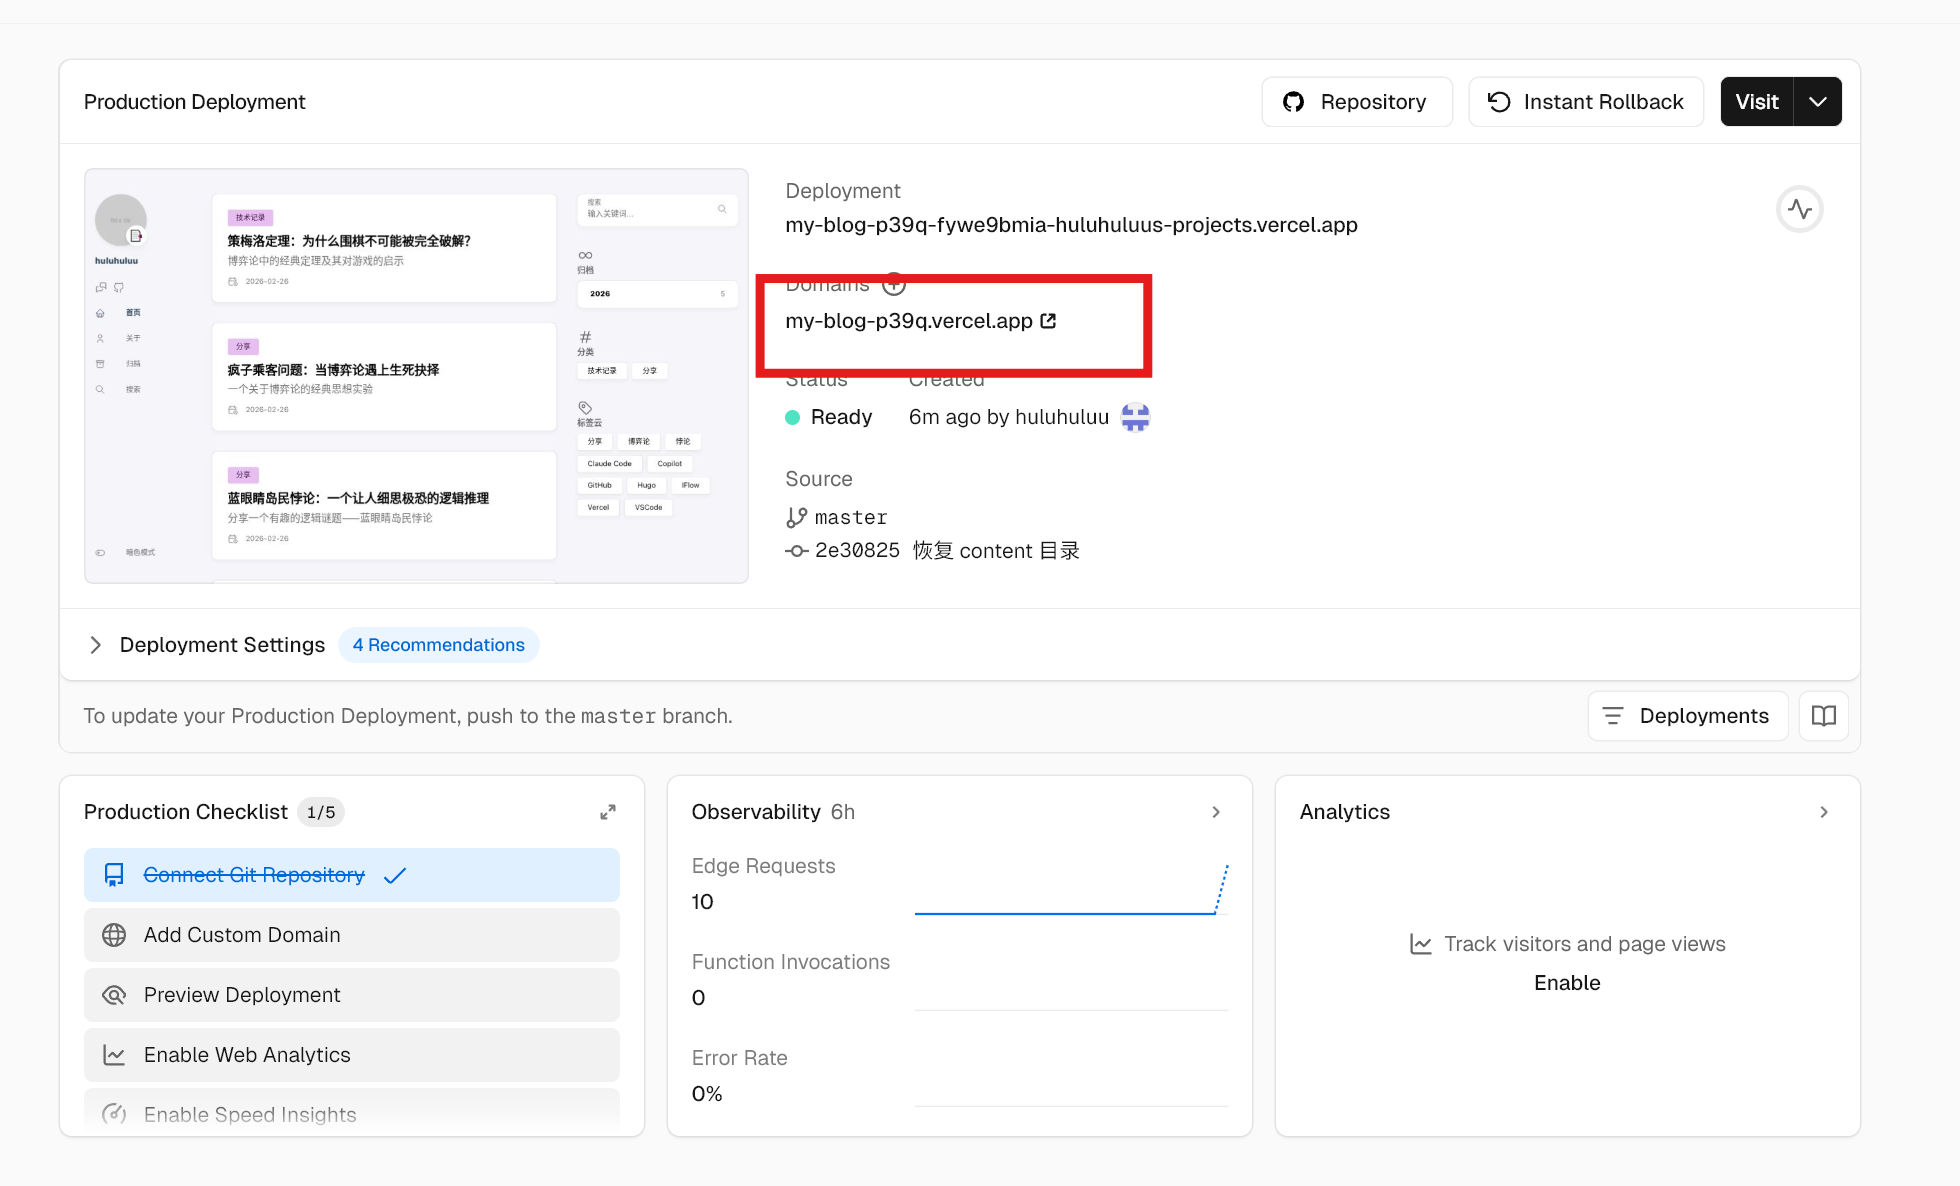
访问即可看到部署好的博客
3.1 添加博客
后续添加博客需要在本地content/post/目录下新建markdown文件,添加内容后提交到github仓库,vercel会自动检测到变化并且重新构建和部署,访问博客即可看到更新后的内容。
3.2 评论系统Giscus
Giscus是一个基于GitHub Discussions的评论系统,可以方便地集成到博客中(参考教程,官方教程)。
-
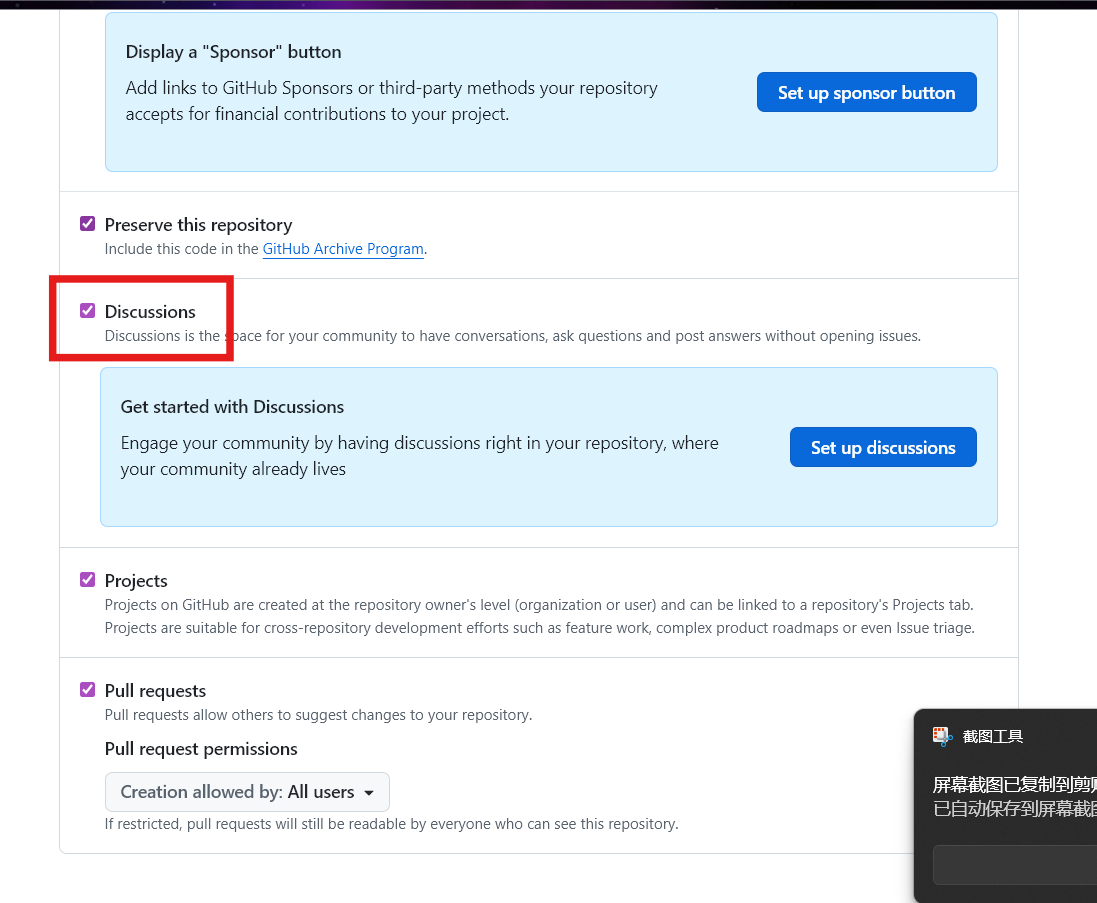
第一步,在GitHub仓库中点击设置
 下滑打开Discussion,用于存放评论数据。
 注意仓库必须是public访问的,才能使用giscus评论系统,在设置界面继续下滑可以找到可见性设置,确保仓库是public的。

-
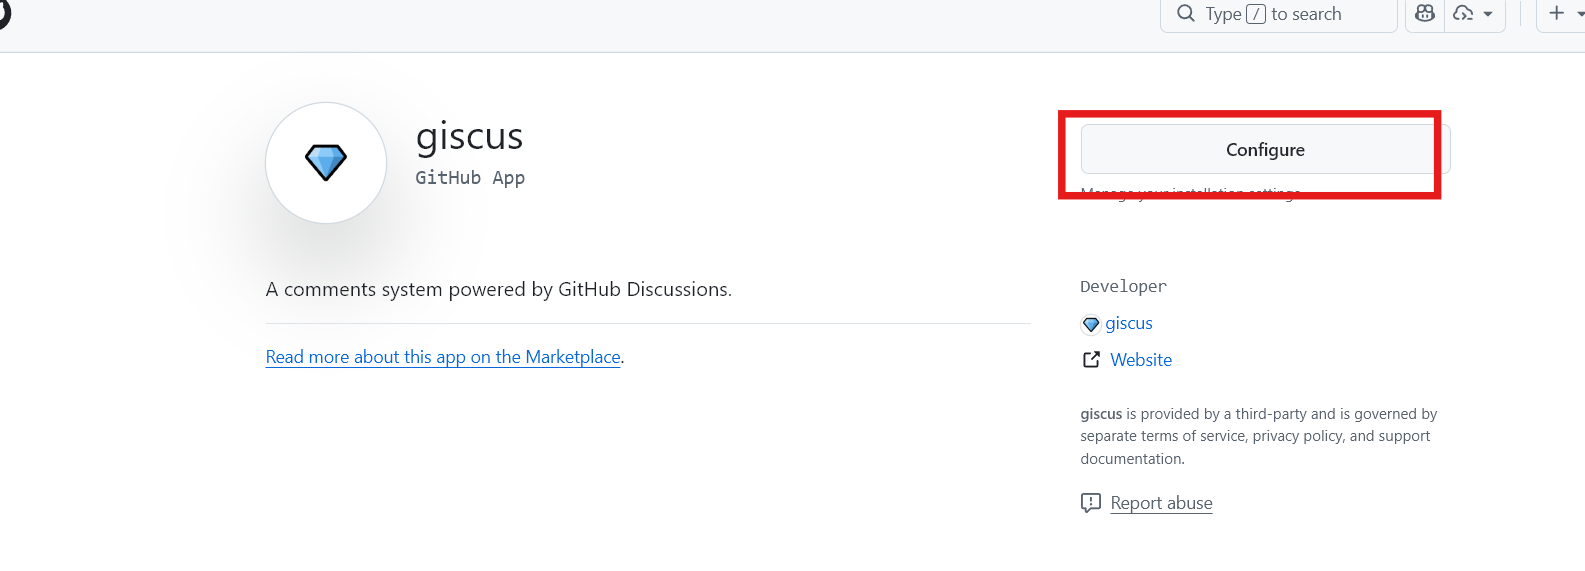
第二步,访问giscus.app,第一次打开是install,选择前面创建的github仓库
 随后在giscus页面,输入仓库链接,验证仓库是否可用giscus评论系统
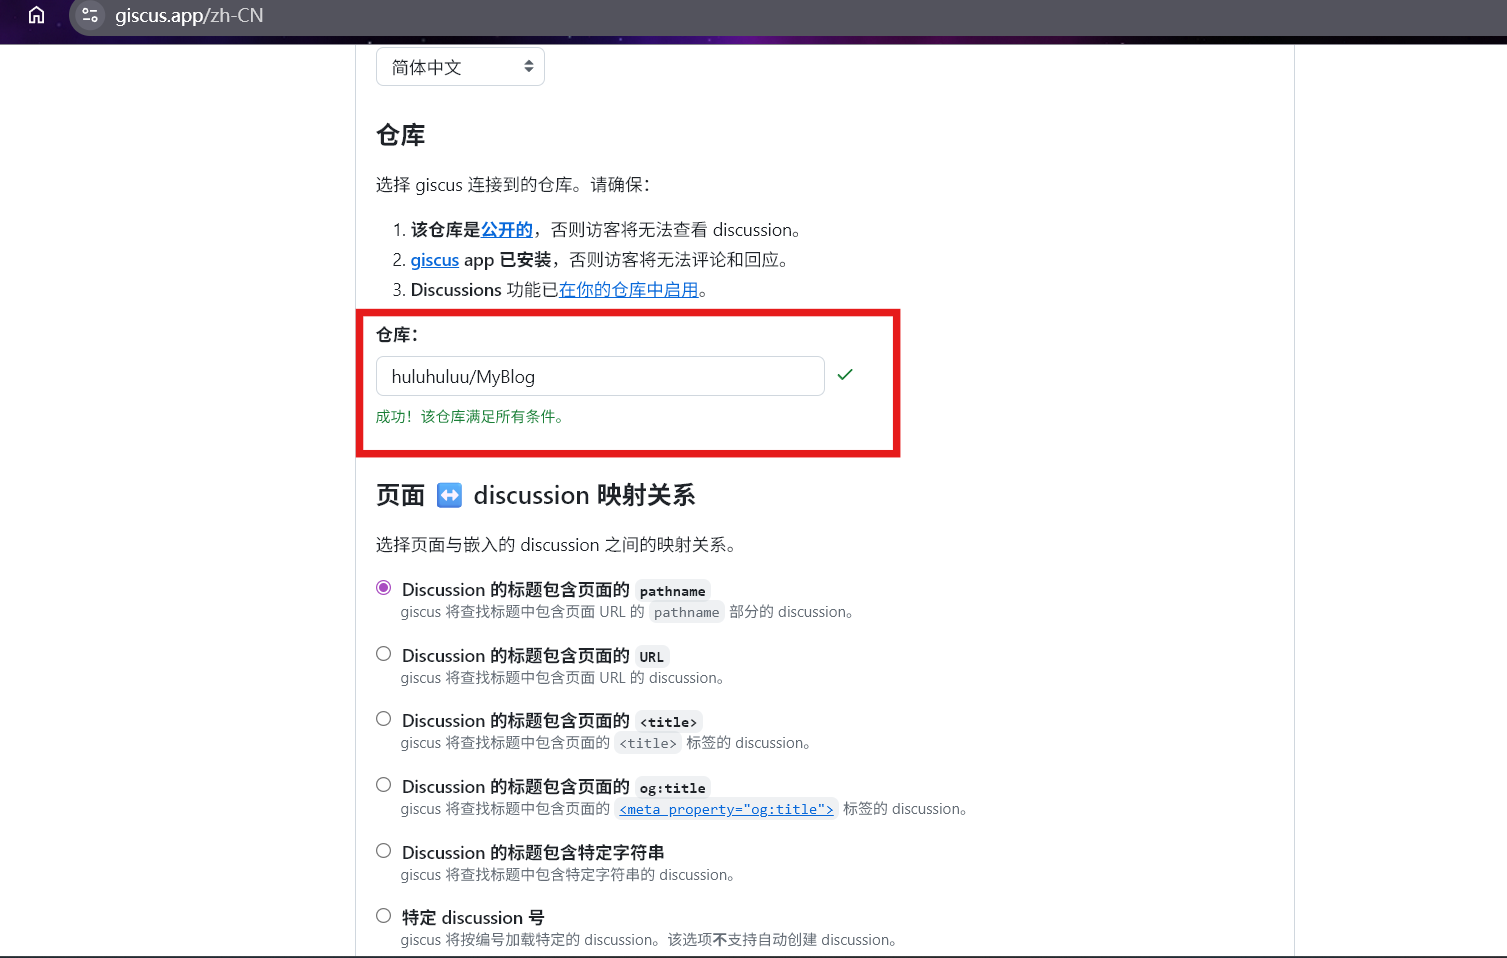 在giscus页面继续下滑,根据提示配置你的仓库和Discussion分类,例如这里discussion分类选择Announcements,继续下滑可以看到生成的
<script>标签,复制下来。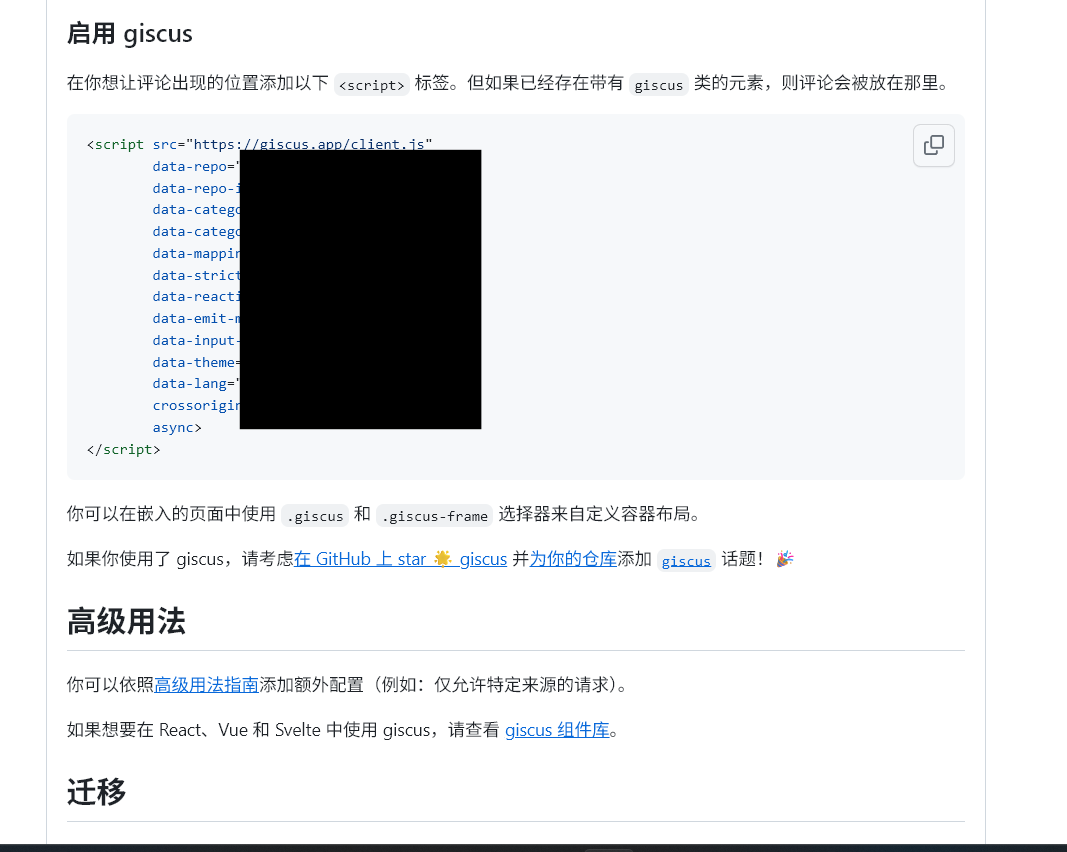
-
第三步,在Hugo博客的配置文件中添加Giscus的相关设置。例如这里添加在
params.toml中: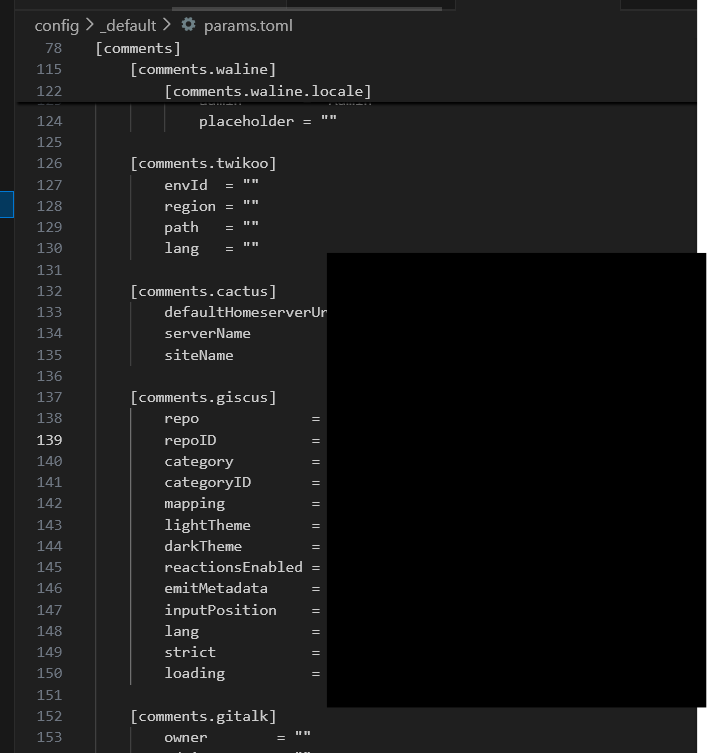
3.3 子仓库自动更新
如果博客中使用了git submodule管理内容,那么每次更新子模块后需要在主仓库中提交子模块的更新,否则vercel部署时会拉取不到最新版本。例如这里我在content/post/mnn-tutorial子模块中更新了内容,提交并且推送到远程仓库后,还需要在主仓库中提交子模块的更新:
|
|
github 提供了GitHub Actions功能,可以在每次子模块更新后自动提交主仓库的更新,避免忘记提交导致vercel部署失败。可以参考。
-
先在
github设置中打开开发者设置:settings -> Developer settings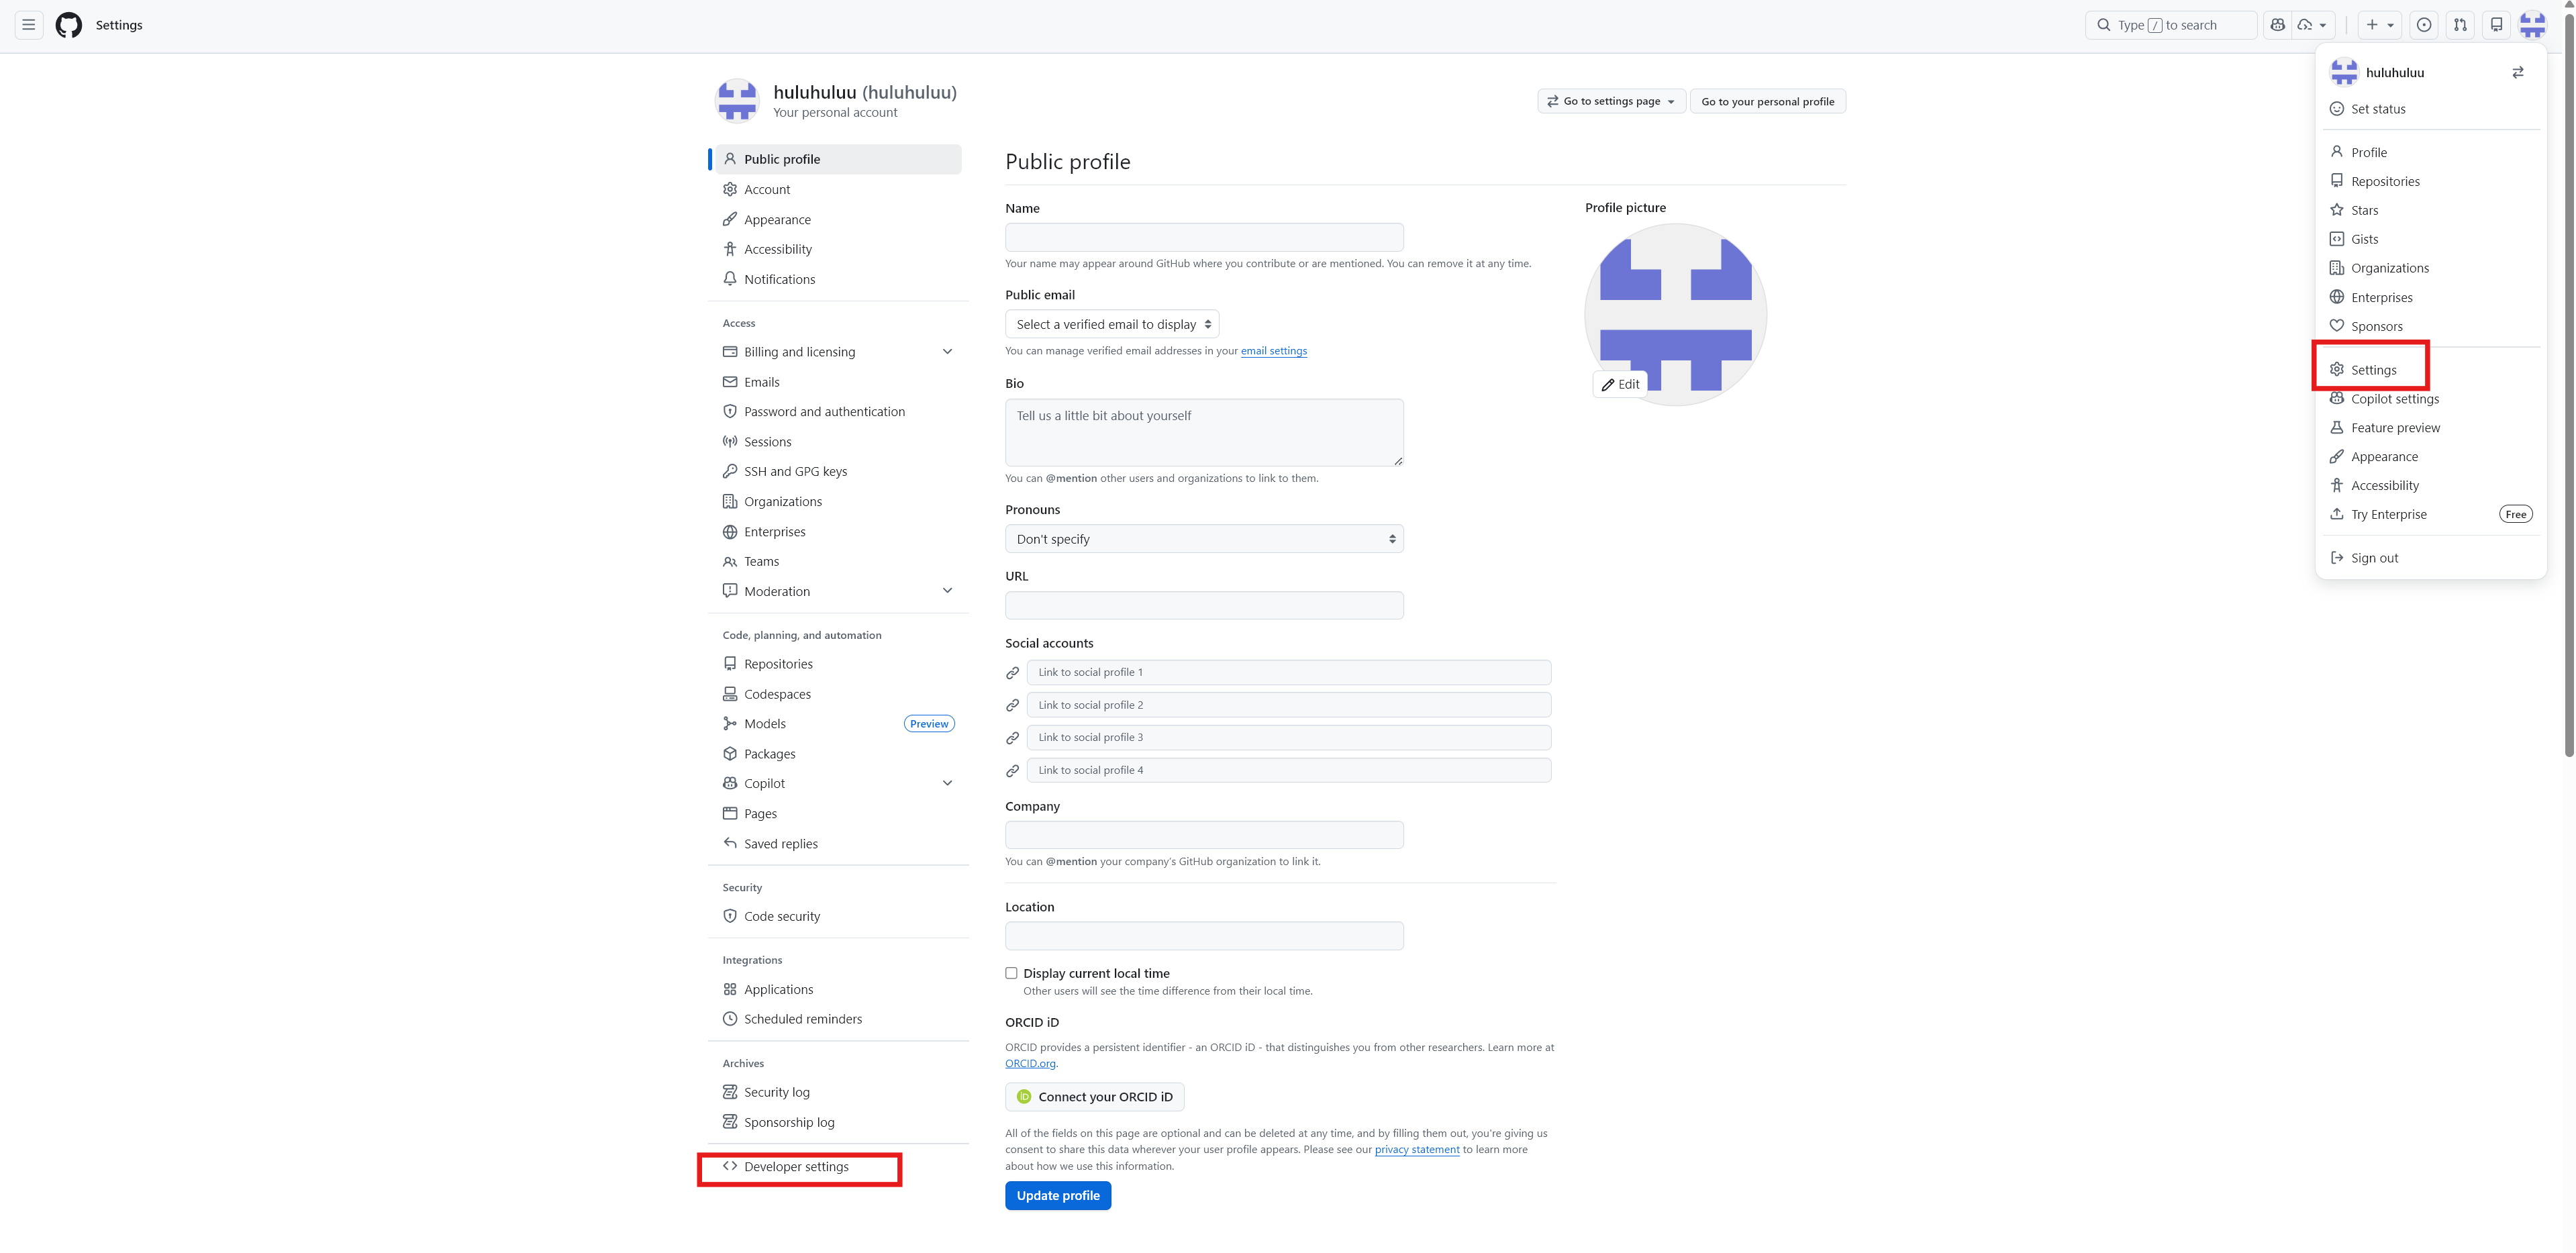
-
新建一个
Personal access tokens,这里选择classic就够了, 需要更细粒度的权限可以选择fine-grained,点击Generate new token继续:
-
设置过期时间,选择
repo权限,滑动到最下方生成Token后复制token值备用,注意这个Token只可见一次,需要妥善保存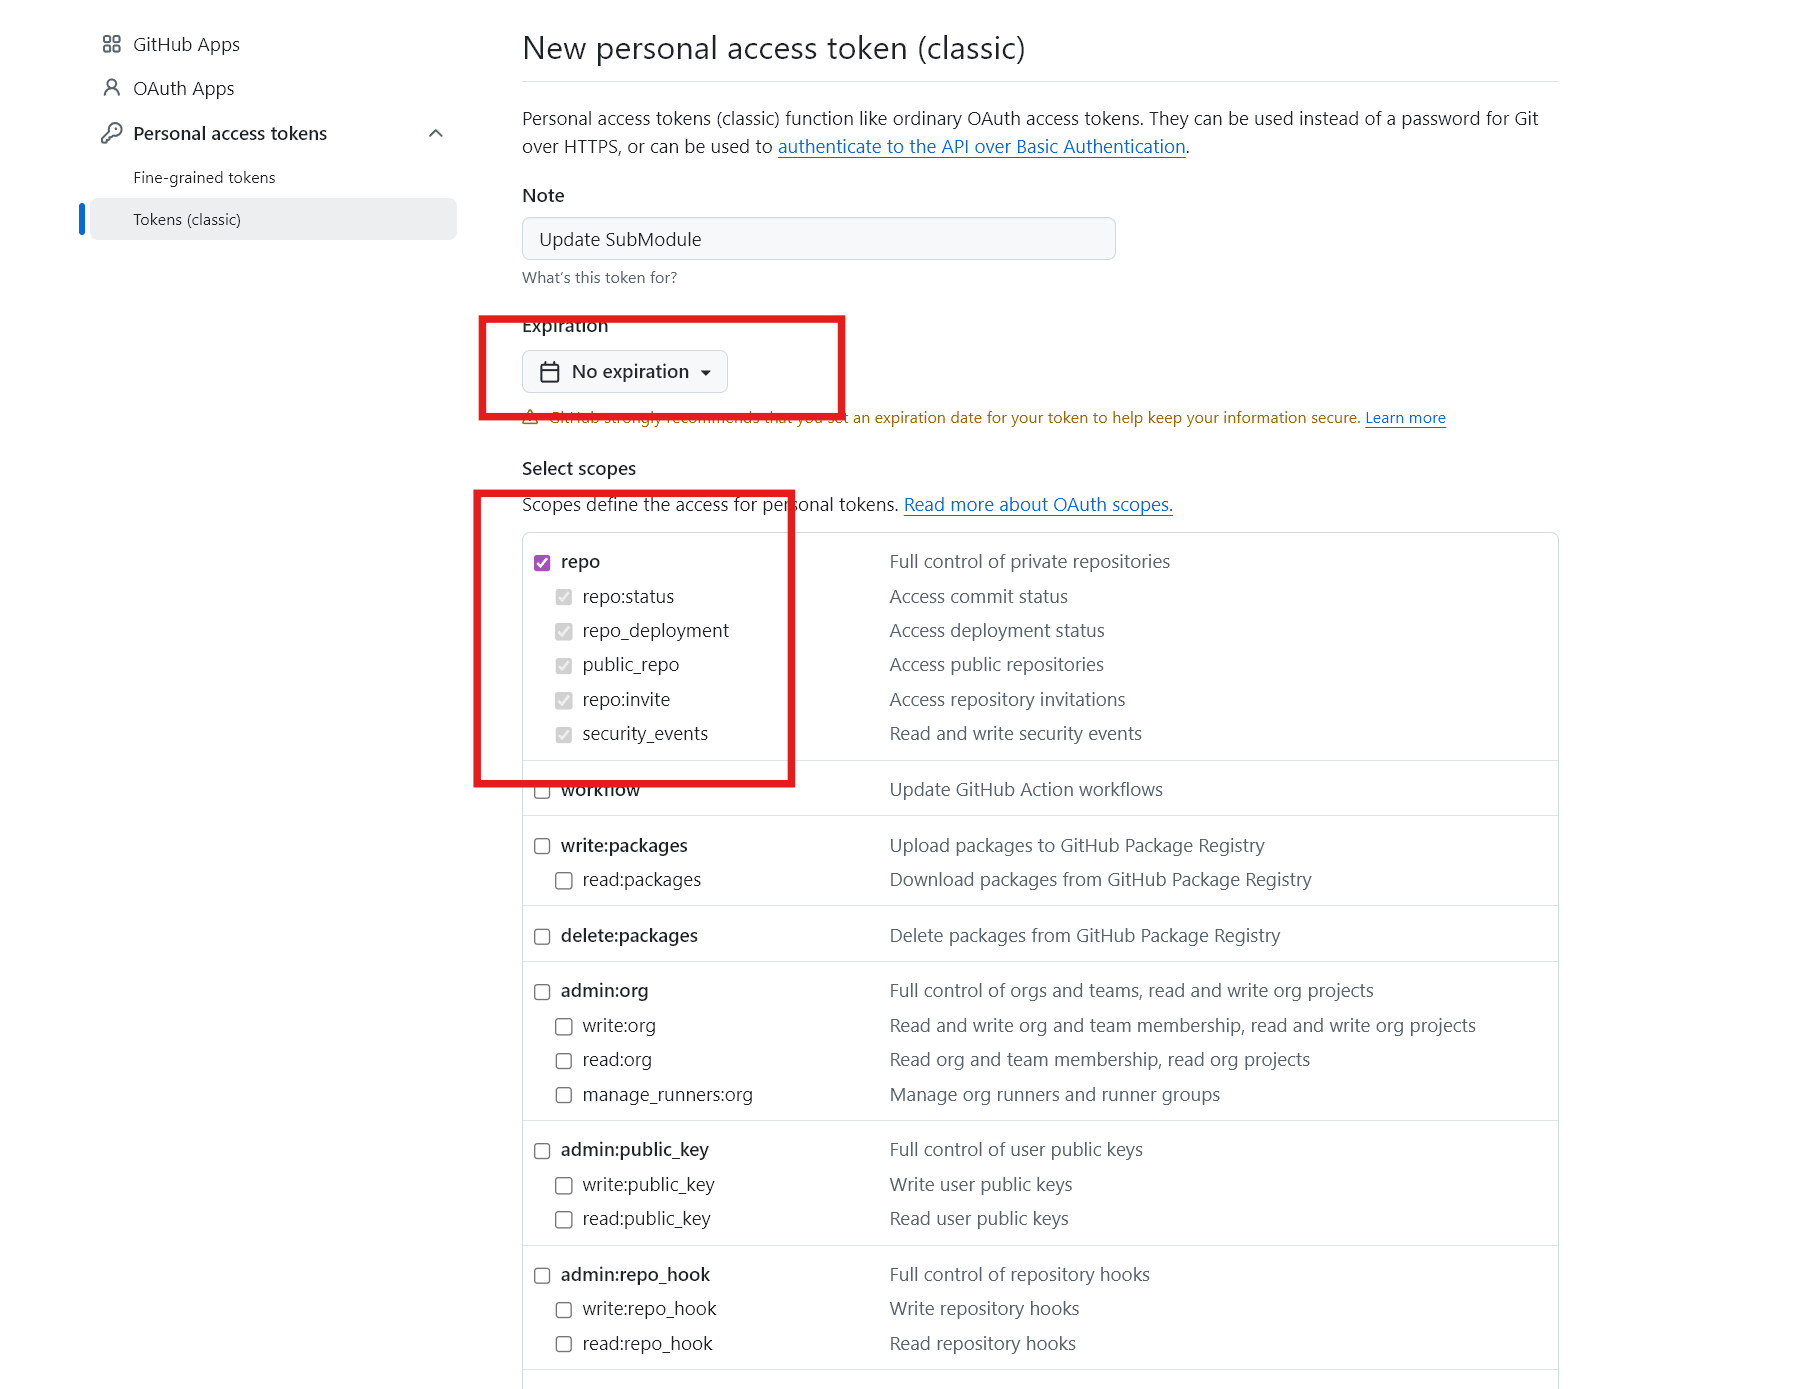
-
在主仓库和子仓库配置
Actions secrets,仓库设置 -> Secrets and variables -> Actions -> New repository secret,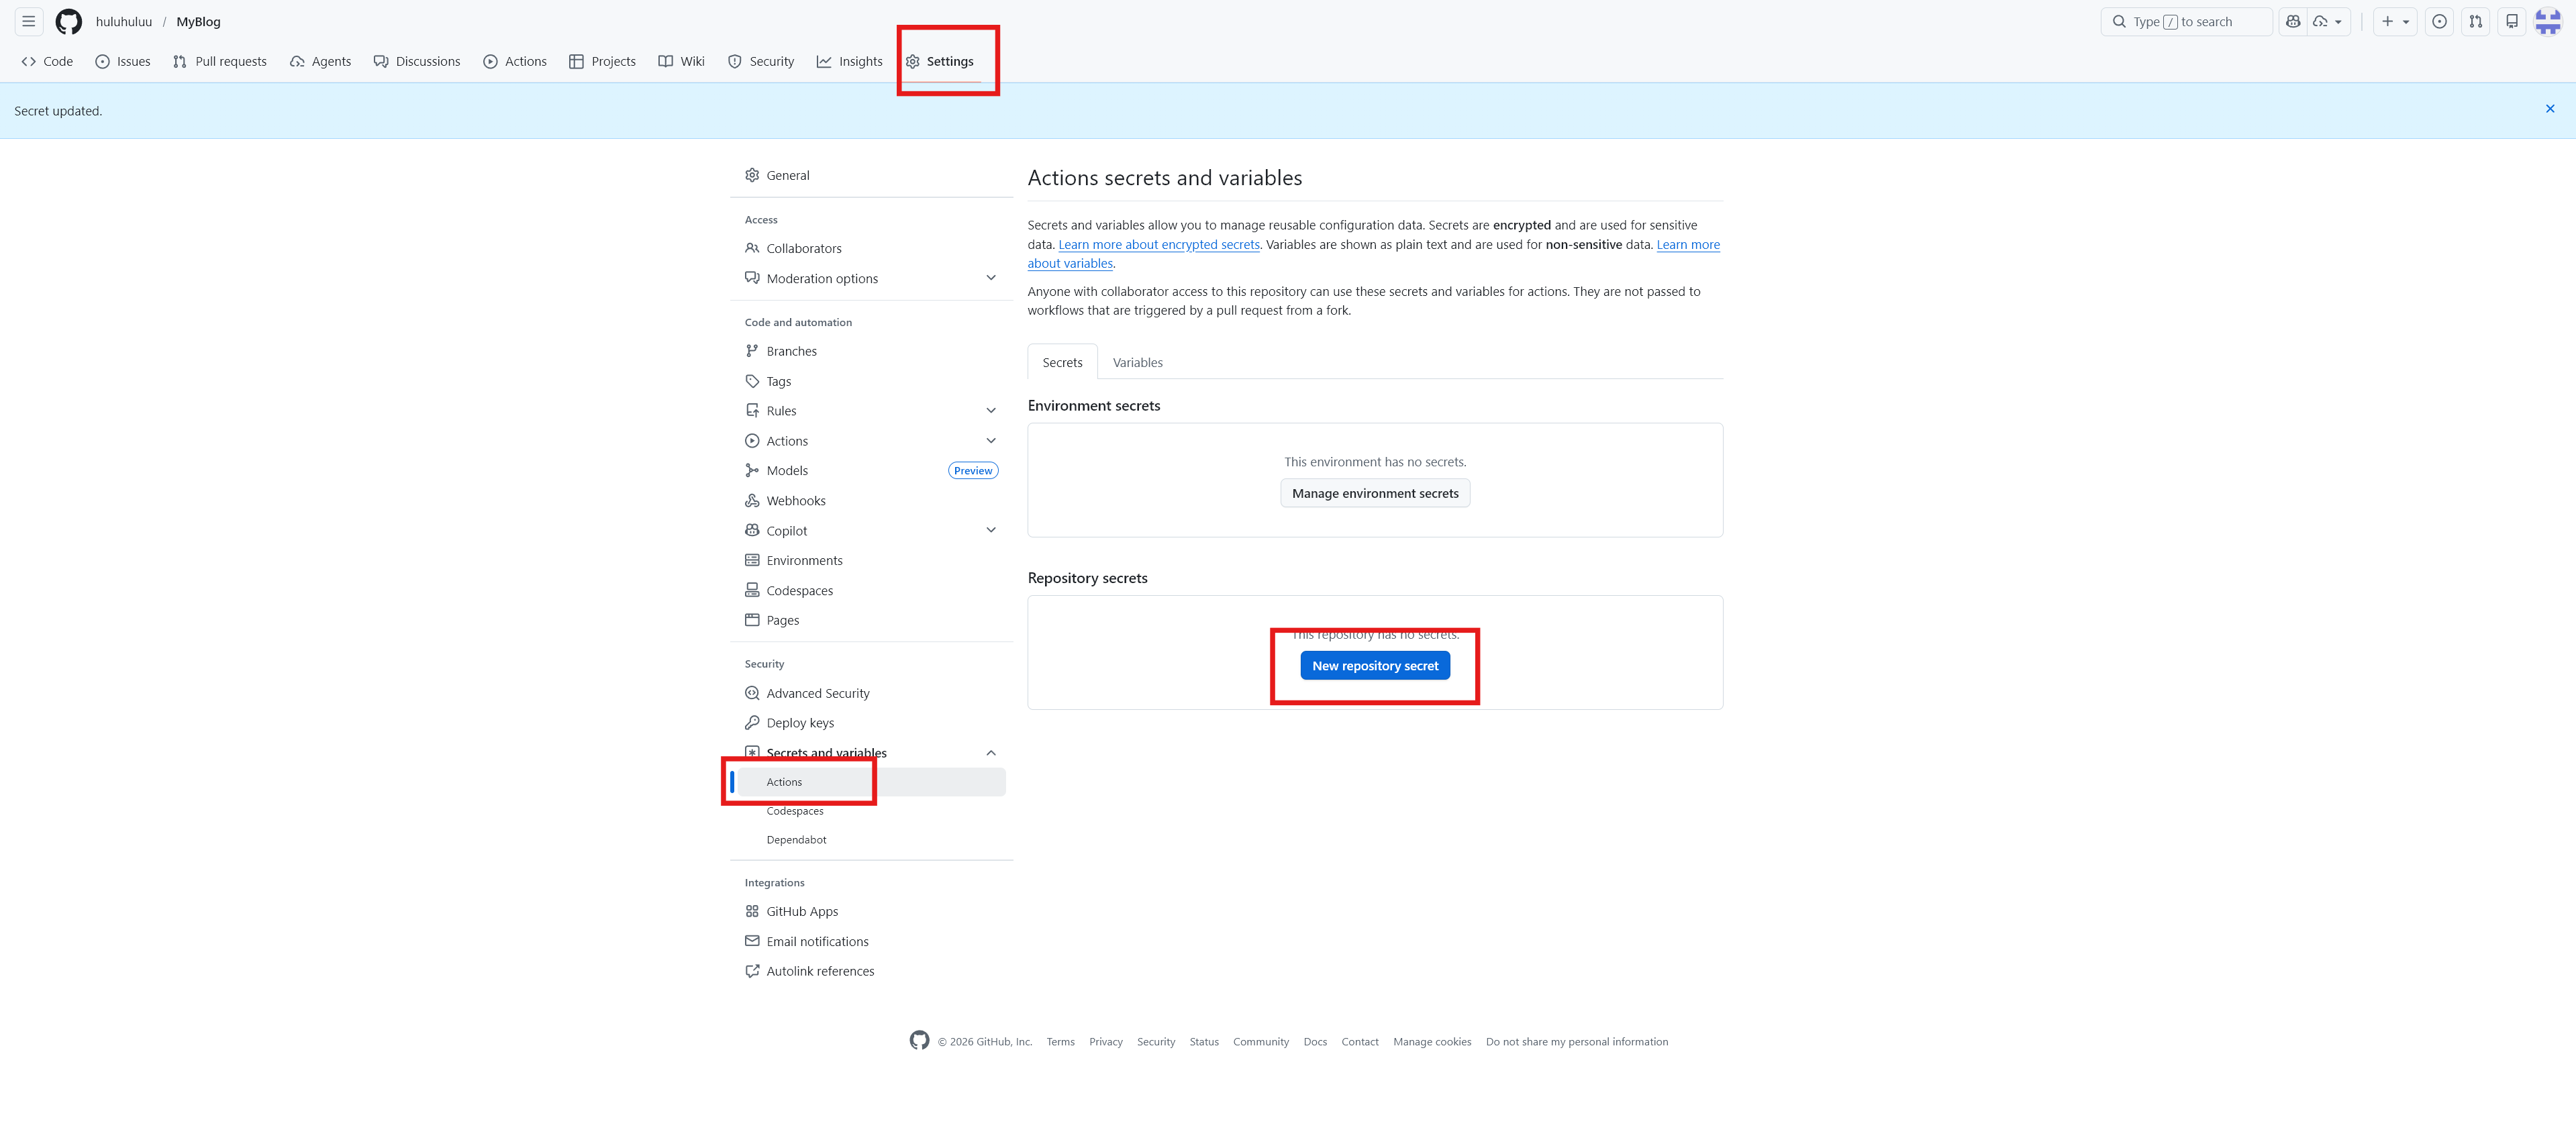
-
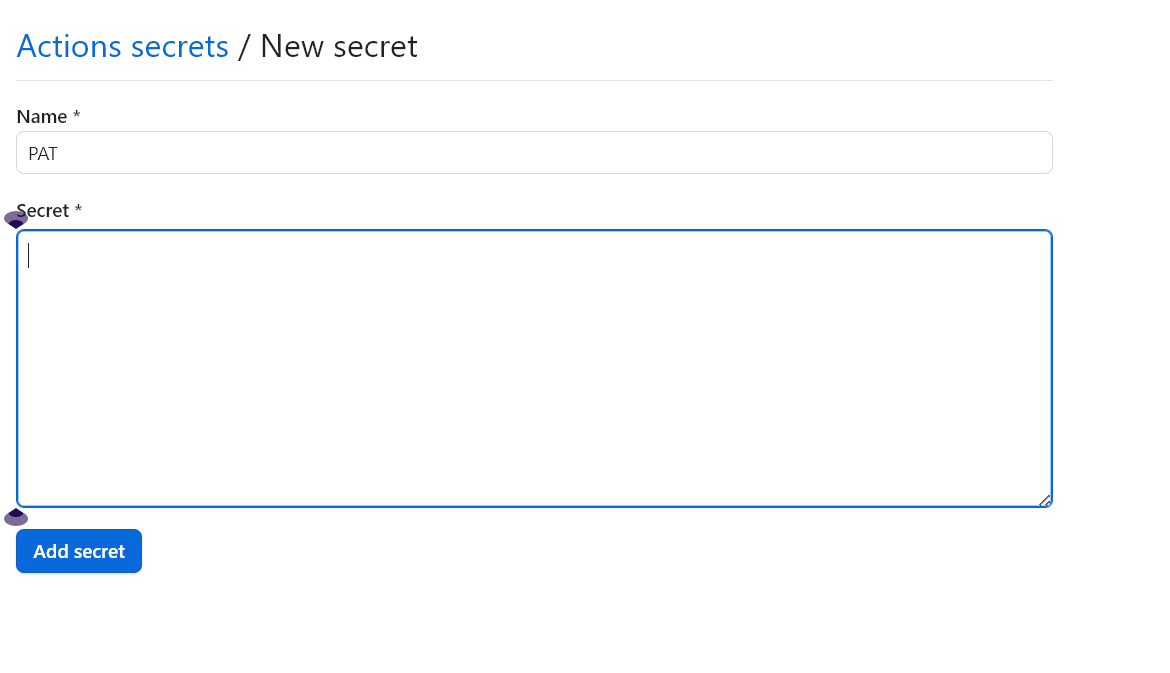
粘贴之前生成的Token值,点击添加保存:
-
GitHub Actions通过编写工作流文件来定义自动化流程,需要在主仓库的.github/workflows目录下新建文件,例如命名为update-submodule.yml,并且添加内容(下面内容来自iflow生成):1 2 3 4 5 6 7 8 9 10 11 12 13 14 15 16 17 18 19 20 21 22 23 24 25 26 27 28 29 30name: Update Submodules on: # 接收来自子仓库的 repository_dispatch 事件 repository_dispatch: types: [update-submodules] # 事件类型,需与子仓库发送的事件名一致 workflow_dispatch: jobs: update: runs-on: ubuntu-latest # 运行环境 steps: - uses: actions/checkout@v4 with: submodules: true fetch-depth: 0 token: ${{ secrets.PAT }} # 更新子模块到远程最新版本 - name: Update submodules run: git submodule update --remote --merge # 提交更改并推送 - name: Commit and push run: | git config user.name "github-actions[bot]" git config user.email "github-actions[bot]@users.noreply.github.com" git add . git diff --quiet && git diff --staged --quiet || git commit -m "chore: update submodules" git push https://x-access-token:${{ secrets.PAT }}@github.com/huluhuluu/MyBlog.git HEAD:master -
同时需要在子仓库的
.github/workflows目录下添加提醒的工作流文件,例如命名为notify-parent.yml,并且添加内容:1 2 3 4 5 6 7 8 9 10 11 12 13 14 15 16 17 18name: Notify Parent Repo # 触发条件:推送到 main 或 master 分支时 on: push: branches: [main, master] workflow_dispatch: # 手动触发按键 jobs: notify: runs-on: ubuntu-latest steps: # 通知父仓库更新子模块 - name: Trigger parent update uses: peter-evans/repository-dispatch@v3 with: token: ${{ secrets.PAT }} repository: huluhuluu/MyBlog # 父仓库地址 event-type: update-submodules # 事件类型需与主仓库监听的事件名一致 -
测试,在子仓库提交一个更新并推送。在子仓库的
Actions界面可以看到触发了Notify Parent Repo的工作流,并且旁边Run workflow按钮可以手动触发该通知工作流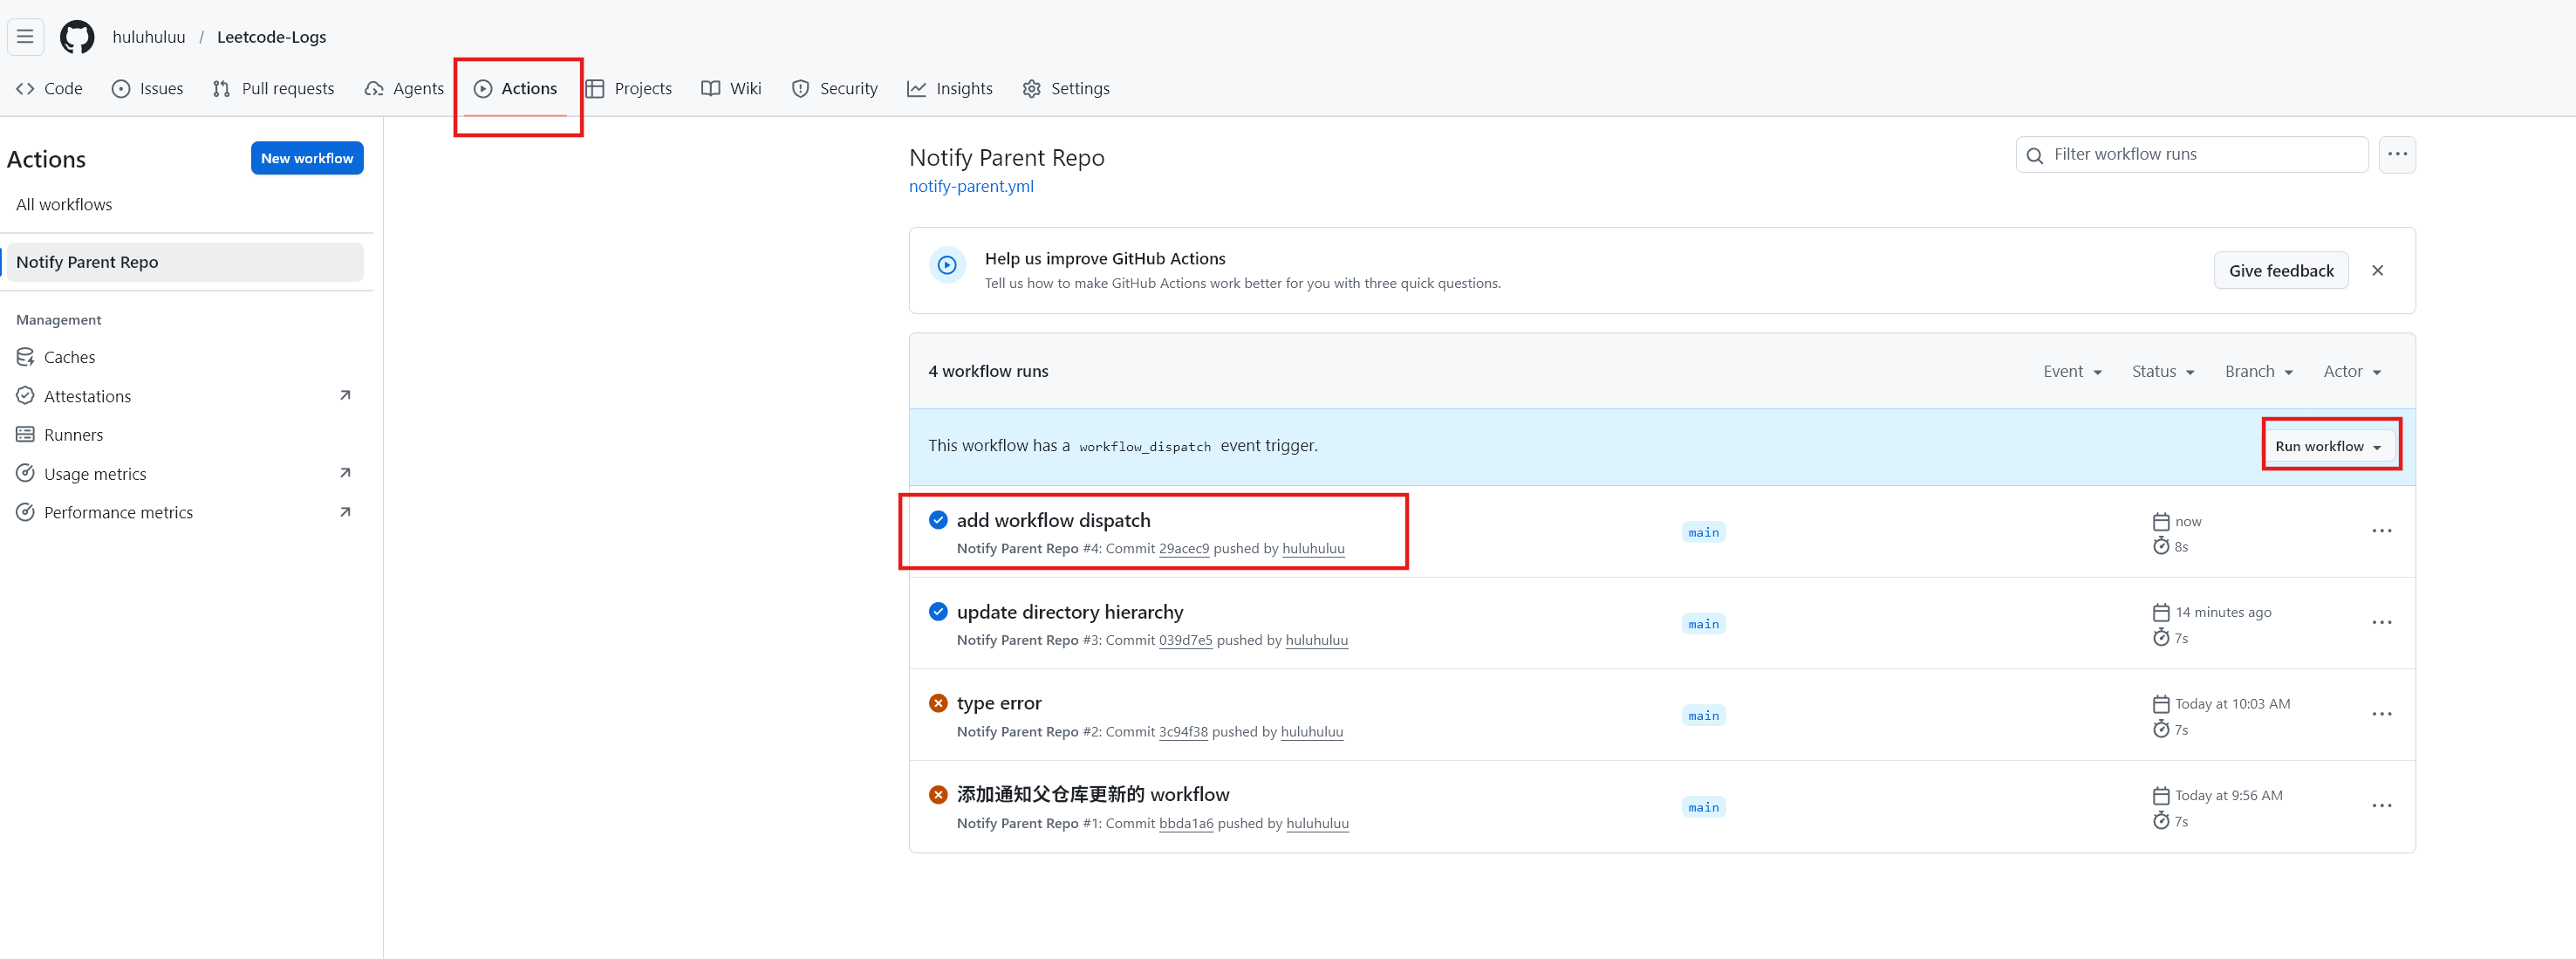
-
查看主仓库的
GitHub Actions是否触发了更新子模块的工作流。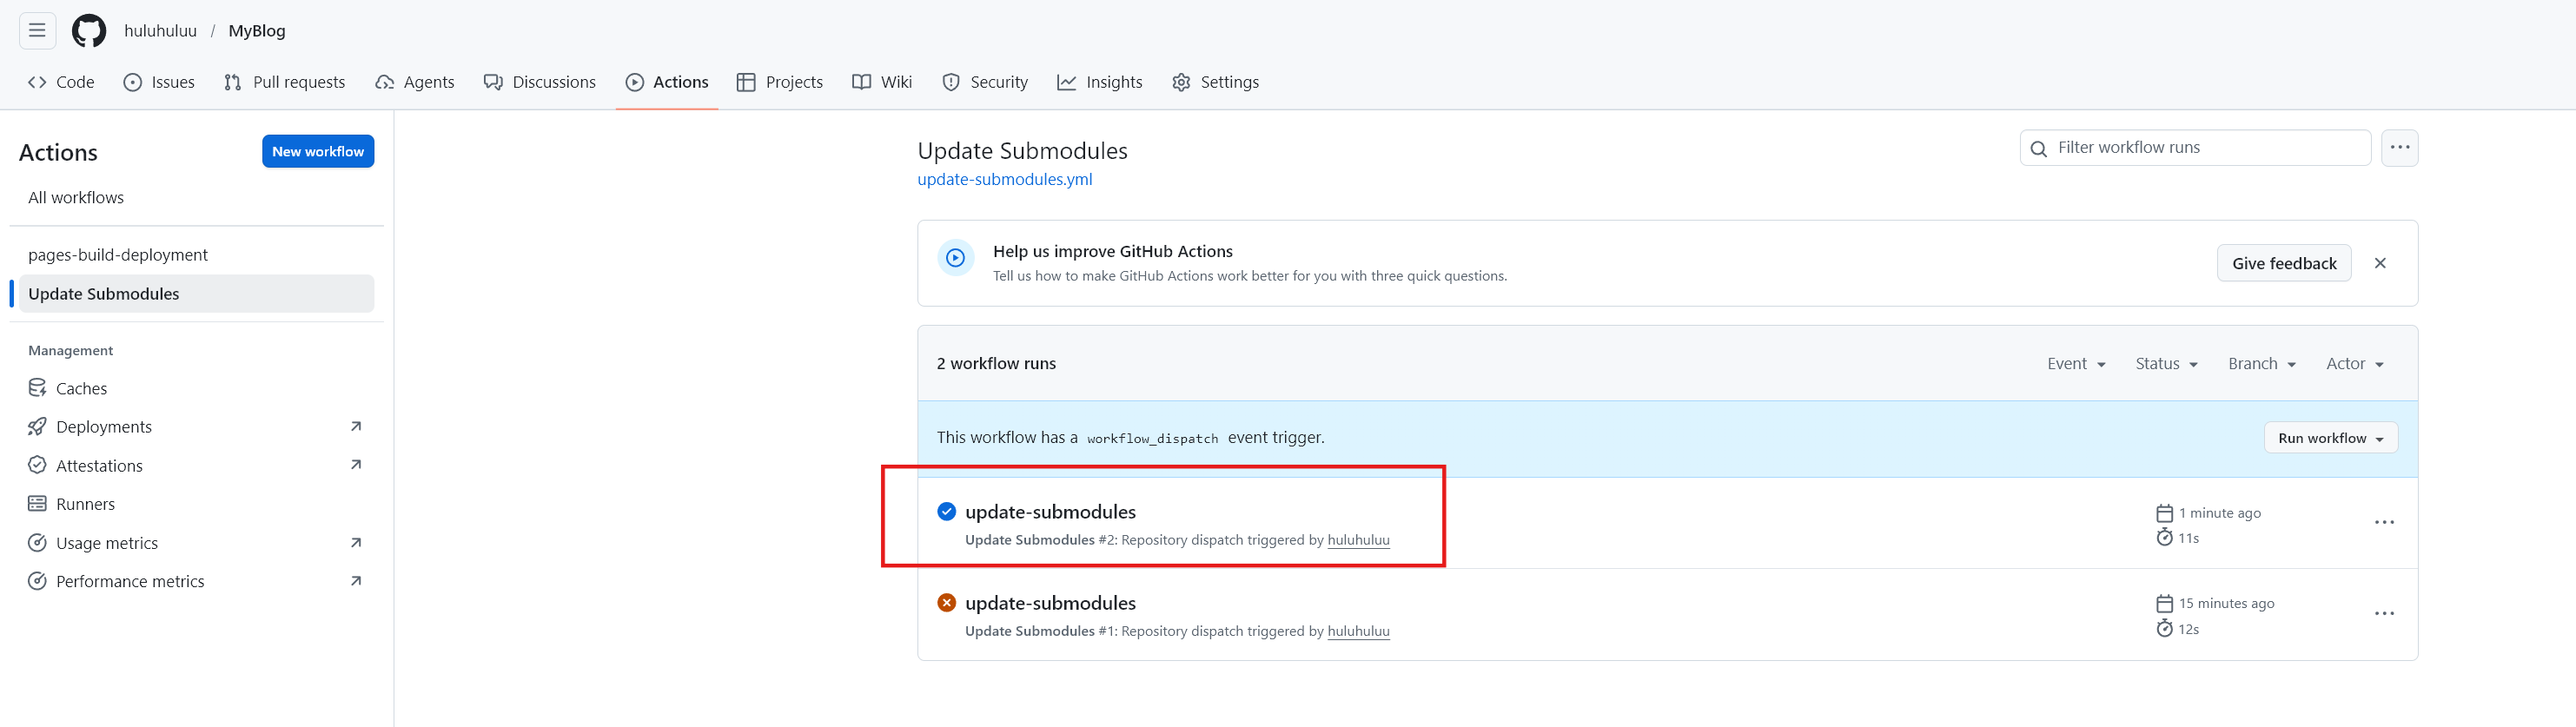
3.4 更新环境变量
如果需要更新环境变量,例如之前配置的HUGO_VERSION,可以在vercel项目设置界面找到Environment Variables,点击编辑即可修改环境变量的值,修改后需要重新部署才能生效。
- 第一步,进入vercel,打开项目设置界面
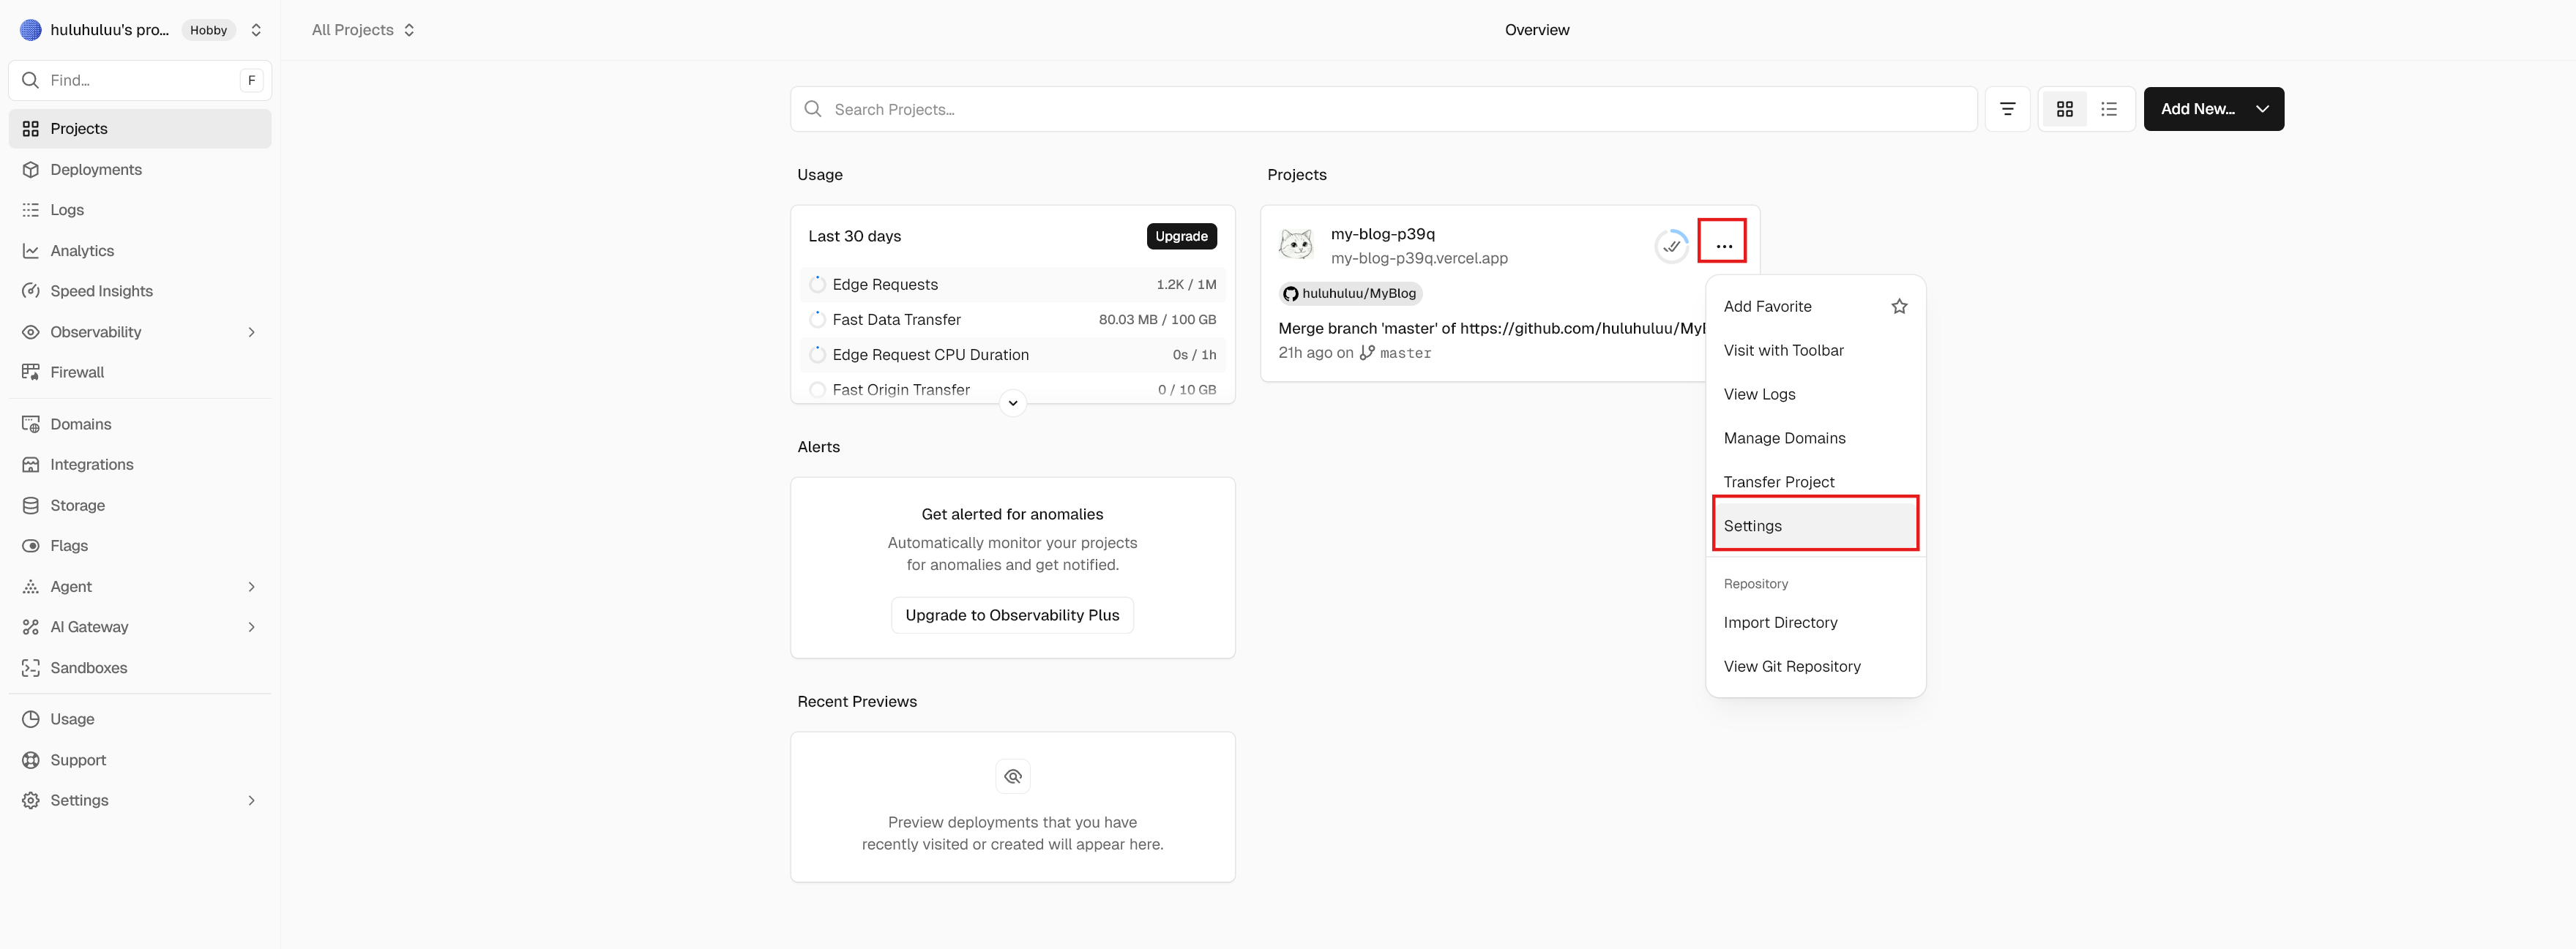
- 第二步,找到
Environment Variables,点击编辑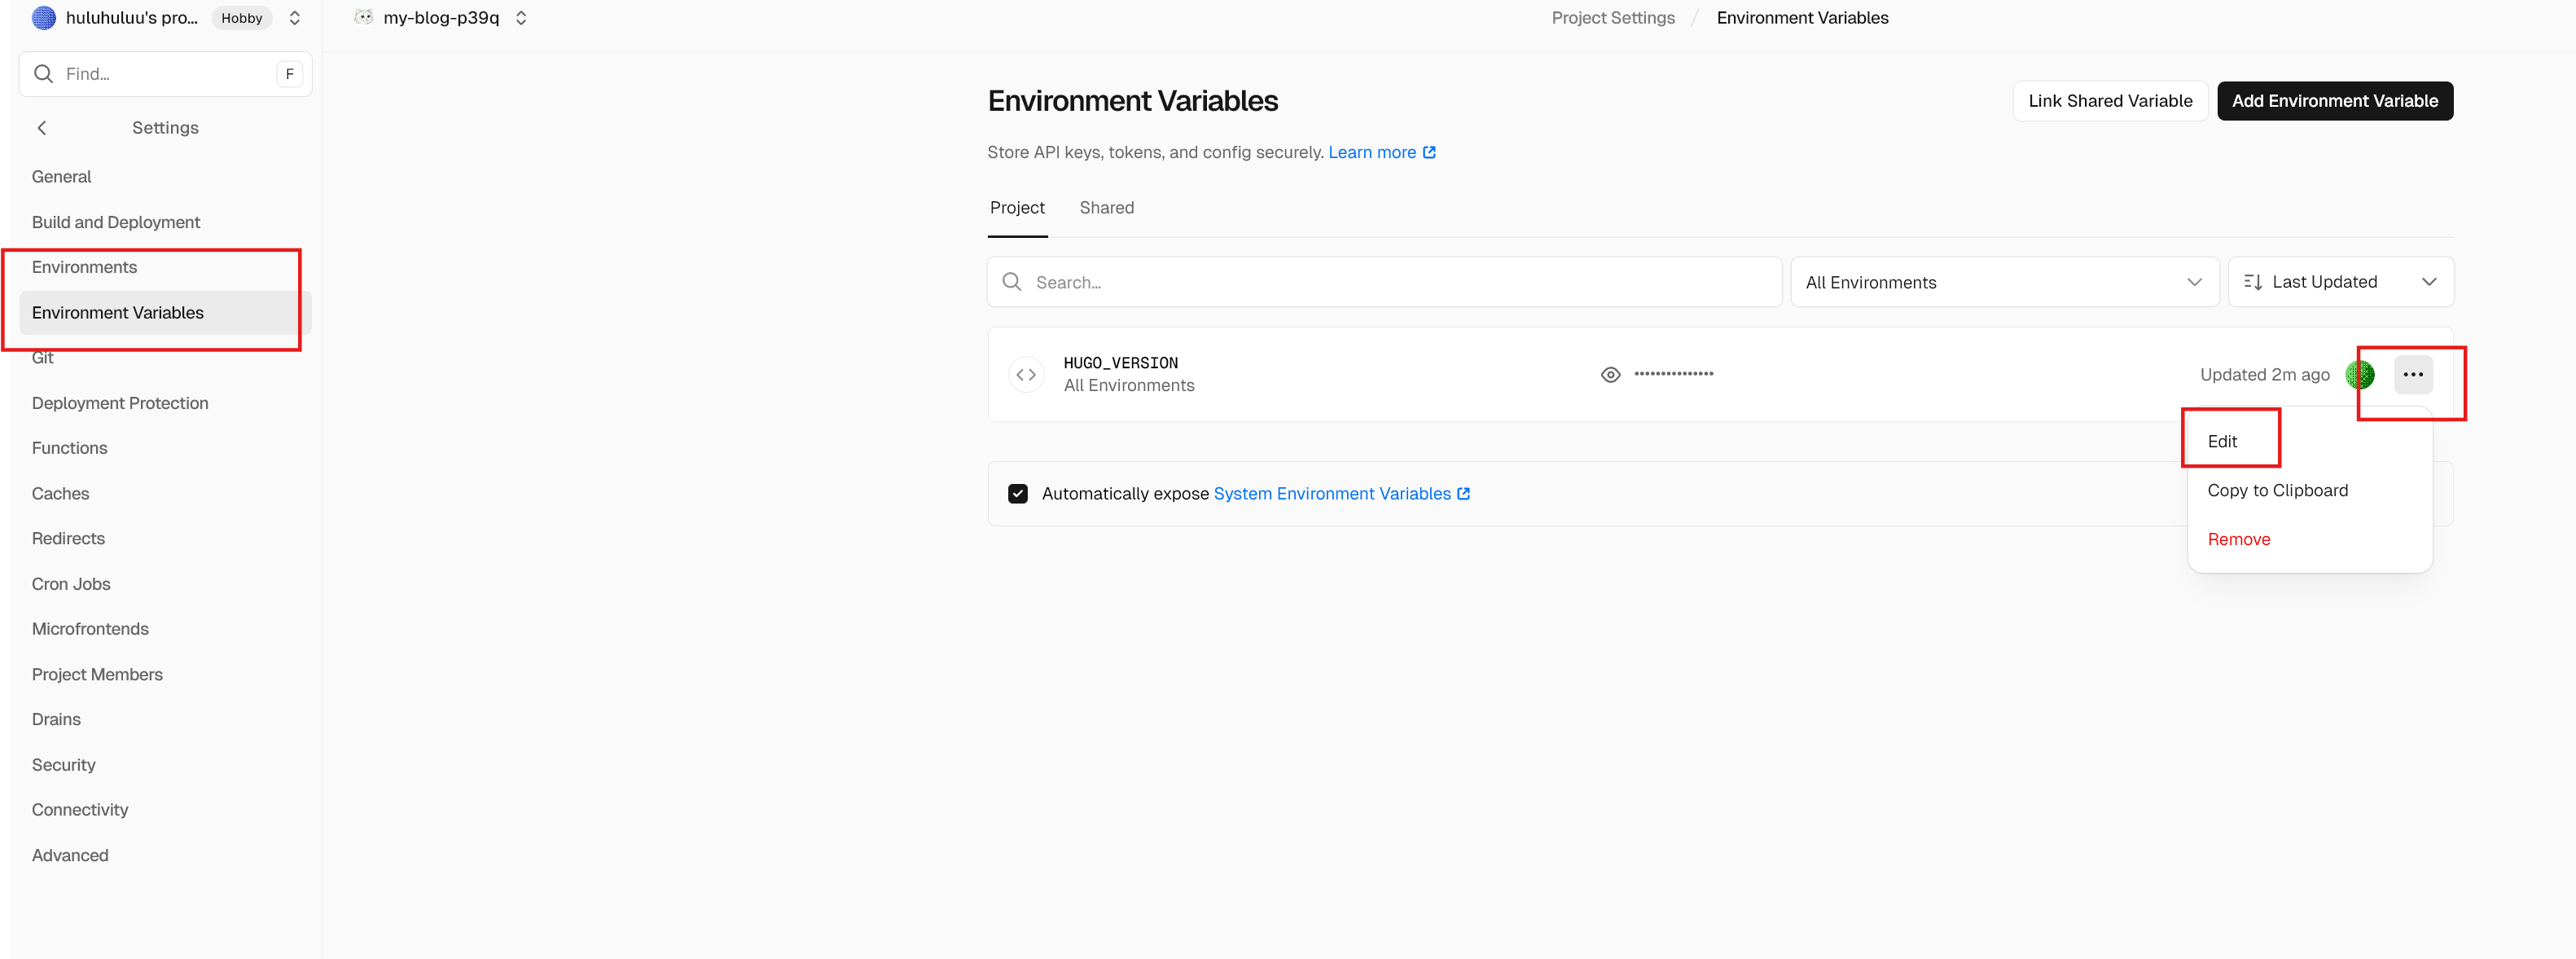
- 第三步,修改环境变量的值,例如把
HUGO_VERSION修改为0.157.0,点击保存
3.5 锁定themes子仓库
子仓库更新后可能对HUGO版本限制更高,导致Vercel部署失败, 可以在主仓库中锁定子仓库的版本,避免每次子仓库更新后都需要修改主仓库的子模块版本。
|
|